An article on Adafruit.com describes how to run OPENSTEP 4.2 in a virtual machine. I went through the steps, and it went smoothly. The only hiccup was a few settings in VirtualBox that are phrased slightly differently in 7.0 for macOS.
Here are screenshots and info about the VirtualBox 7.0 settings to use when following along with the Adafruit article. This article isn’t a complete tutorial for setting up OPENSTEP 4.2 in VirtualBox, as there are a lot more steps beyond this; follow along with both articles side-by-side for the best experience.
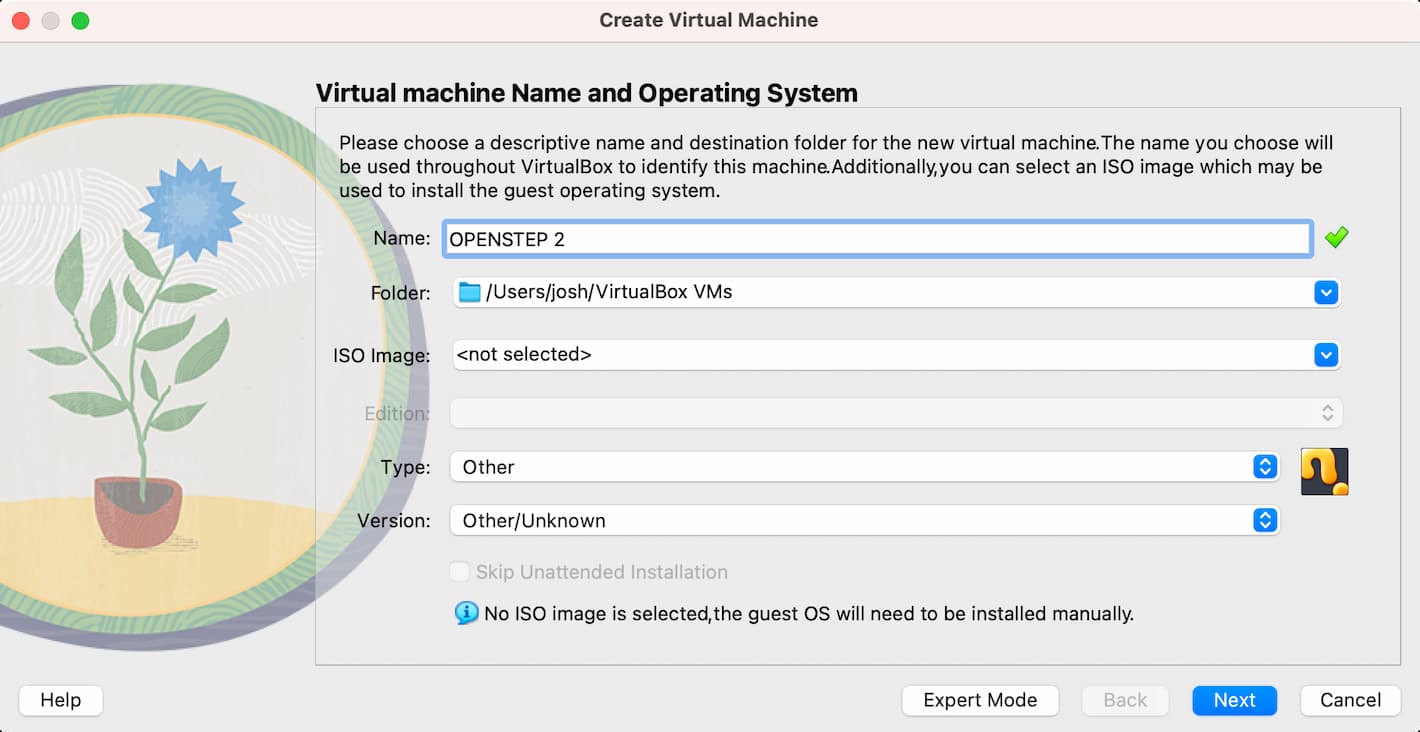
When first creating the virtual machine, the “Type” dropdown is set to “Other”, and the “Version” dropdown is set to “Other/Unknown”. Note that you don’t specify an “ISO Image” at this point; leave it at the default “<not selected>”.
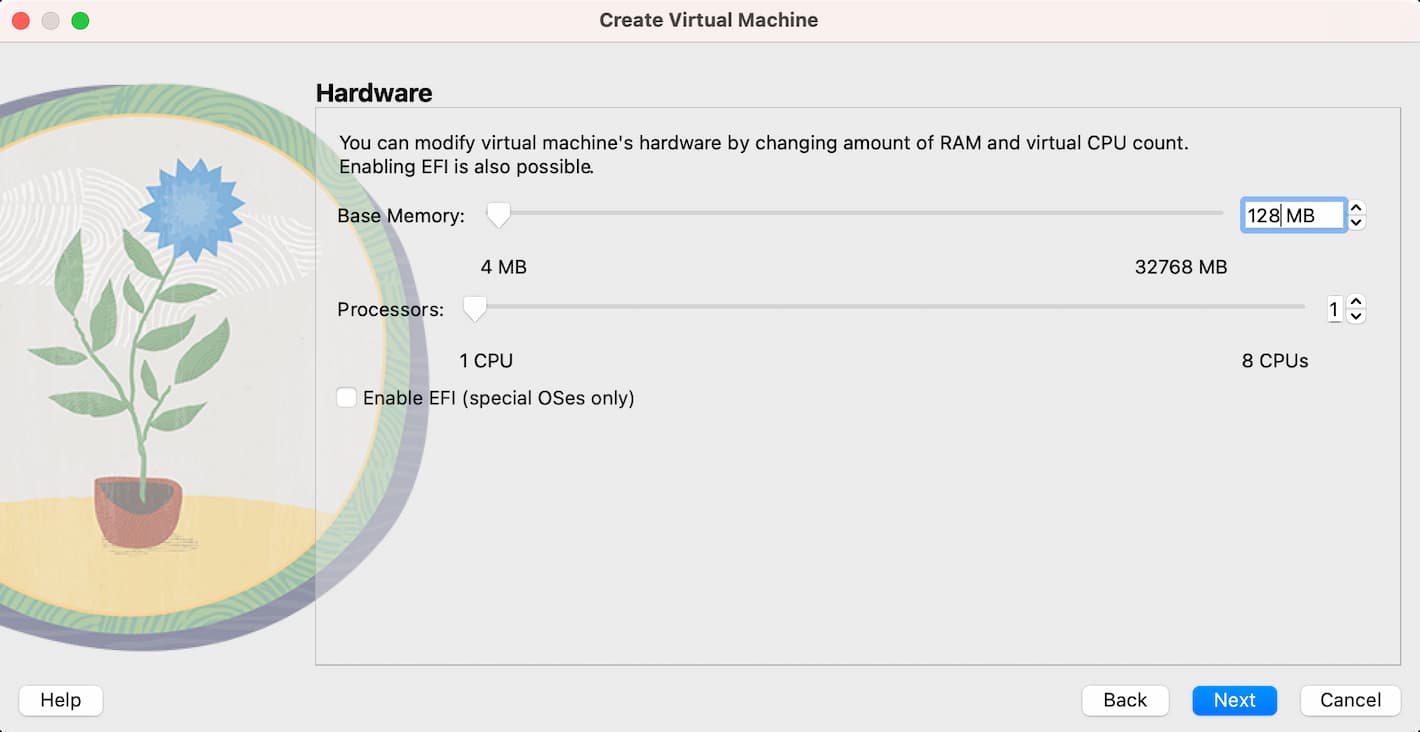
In the Hardware step, the “Base Memory” value is what you set to 128 MB.
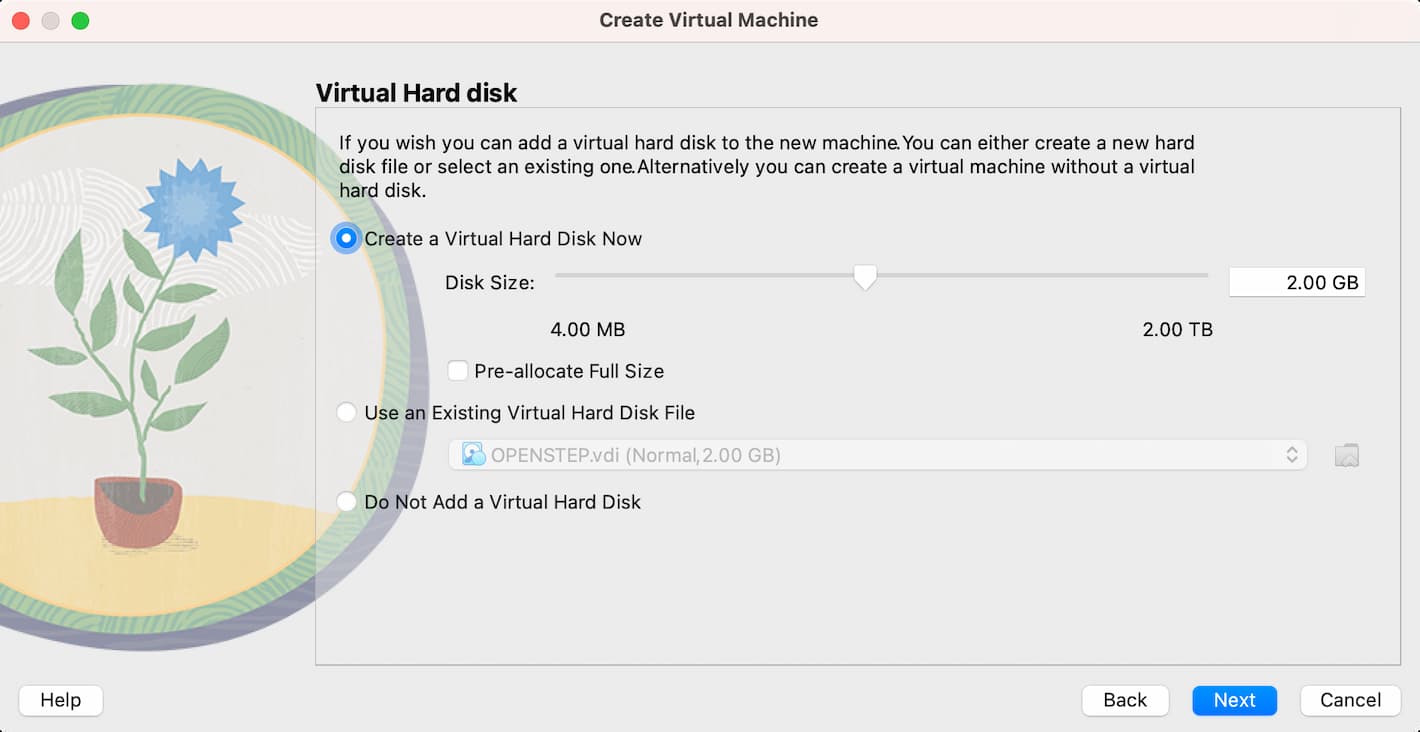
In the Virtual Hard disk step, make sure the disk size is set to 2 GB. Note that you will only be prompted for the disk size; there is not a need to specify VDI or Dynamically allocated.
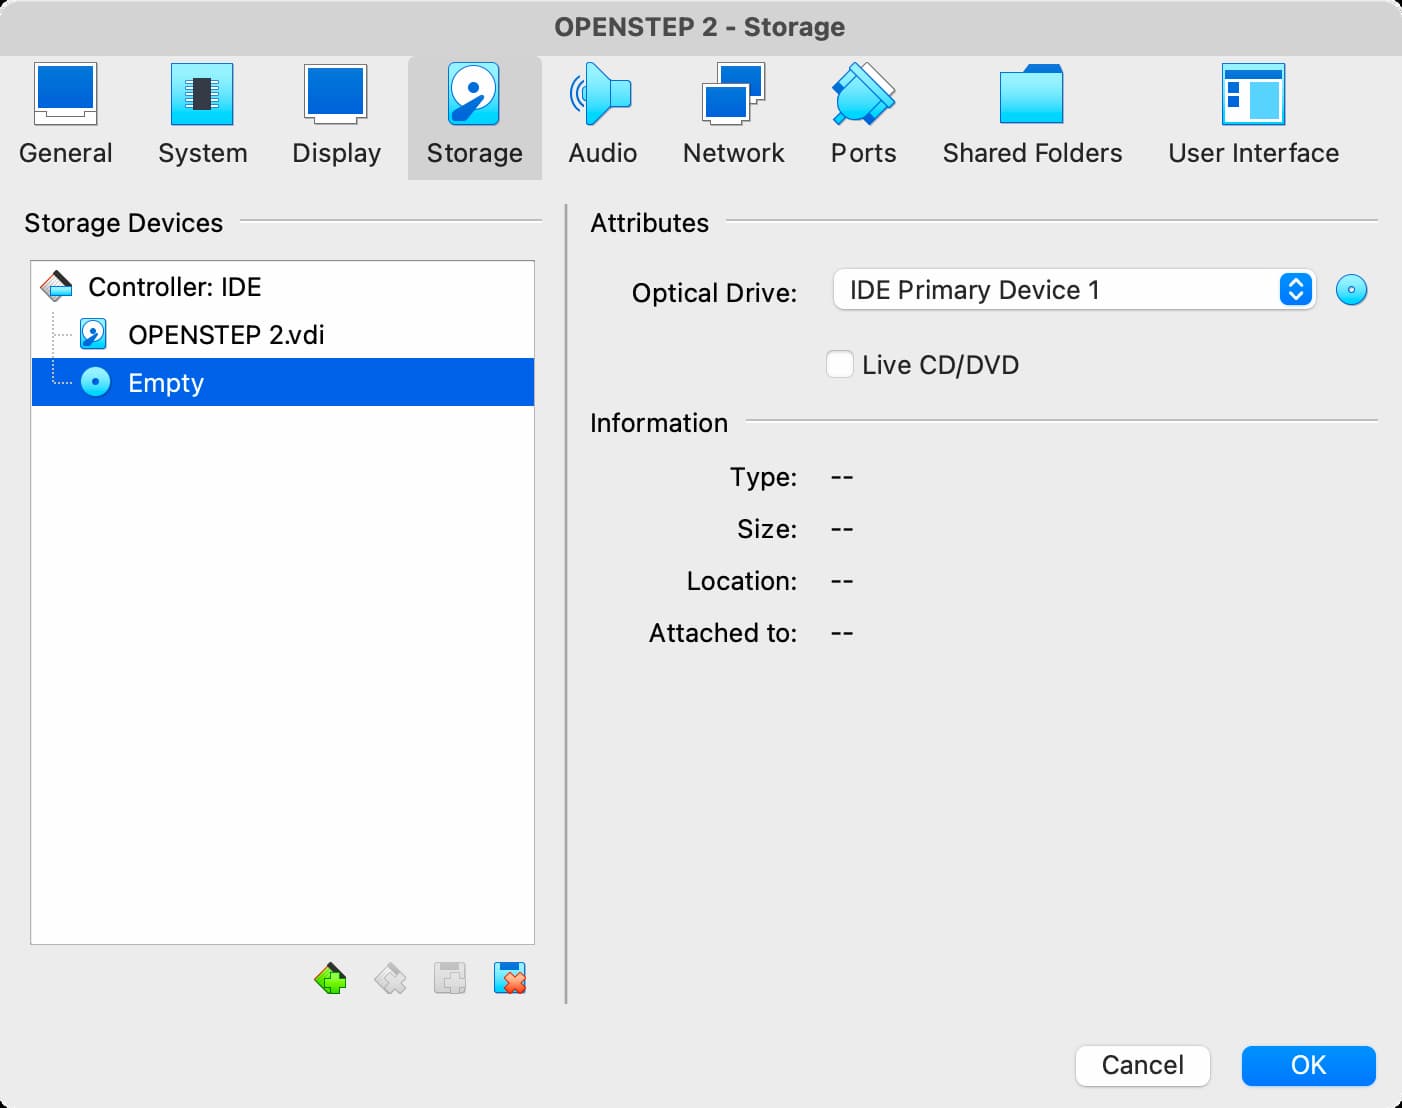
When you open Settings, go to Storage, and choose the Optical Drive, the setting you should change it to is now called “IDE Primary Device 1”.
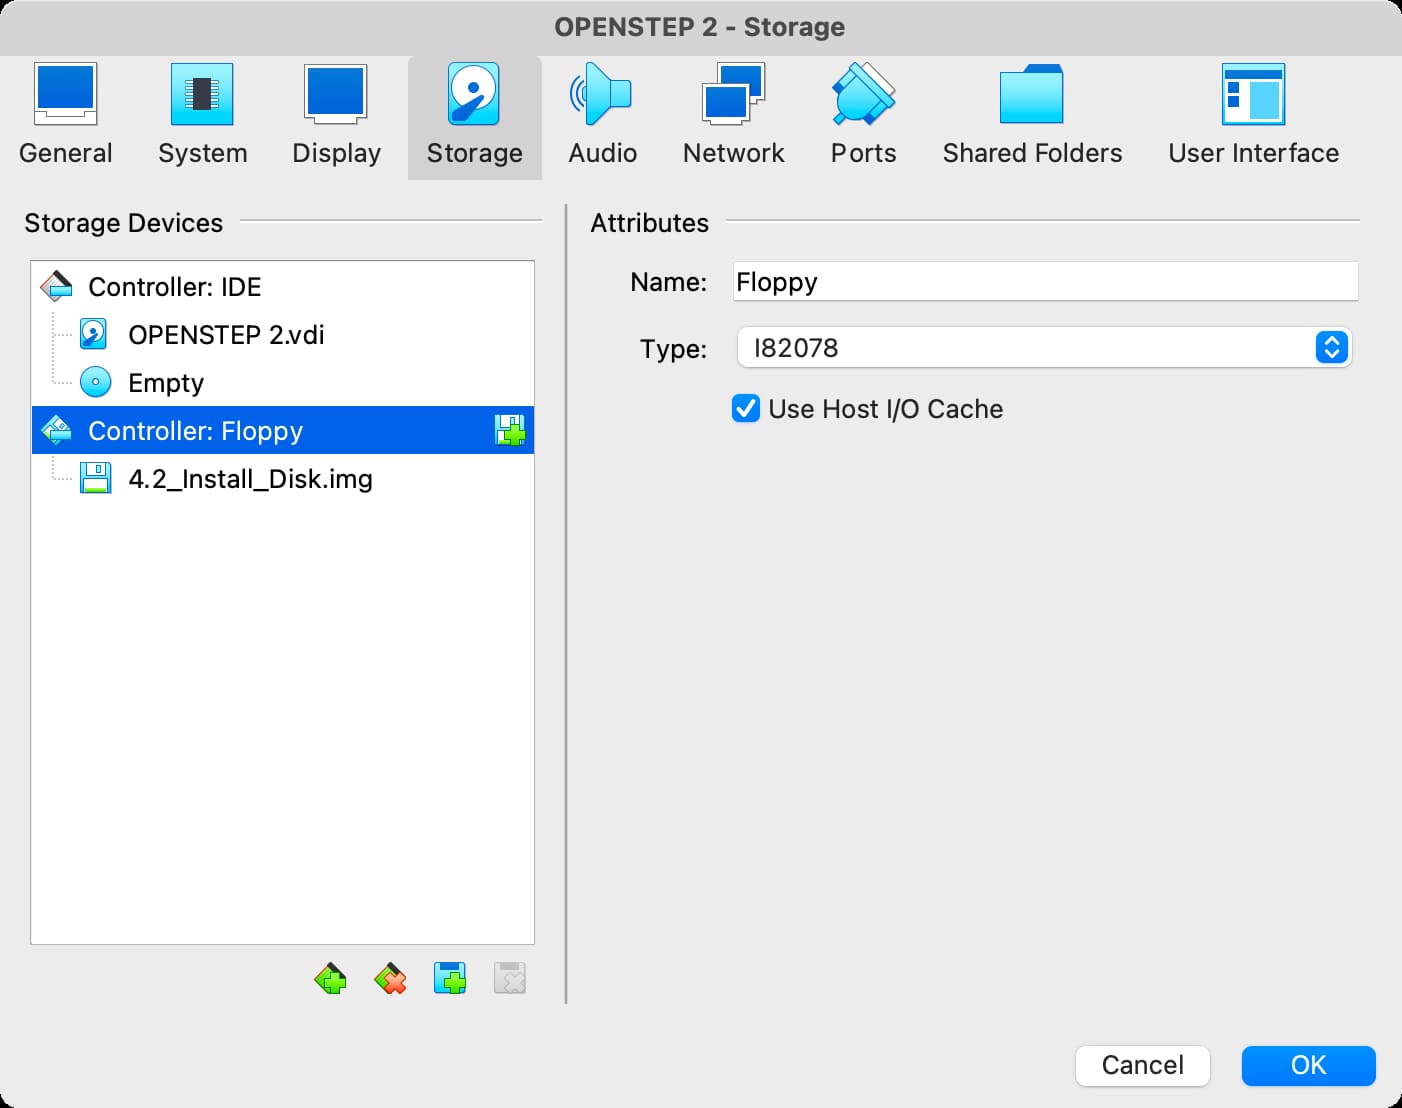
To add a floppy disk controller, click the “Add New Controller” icon, then choose “I82078 (Floppy)”.
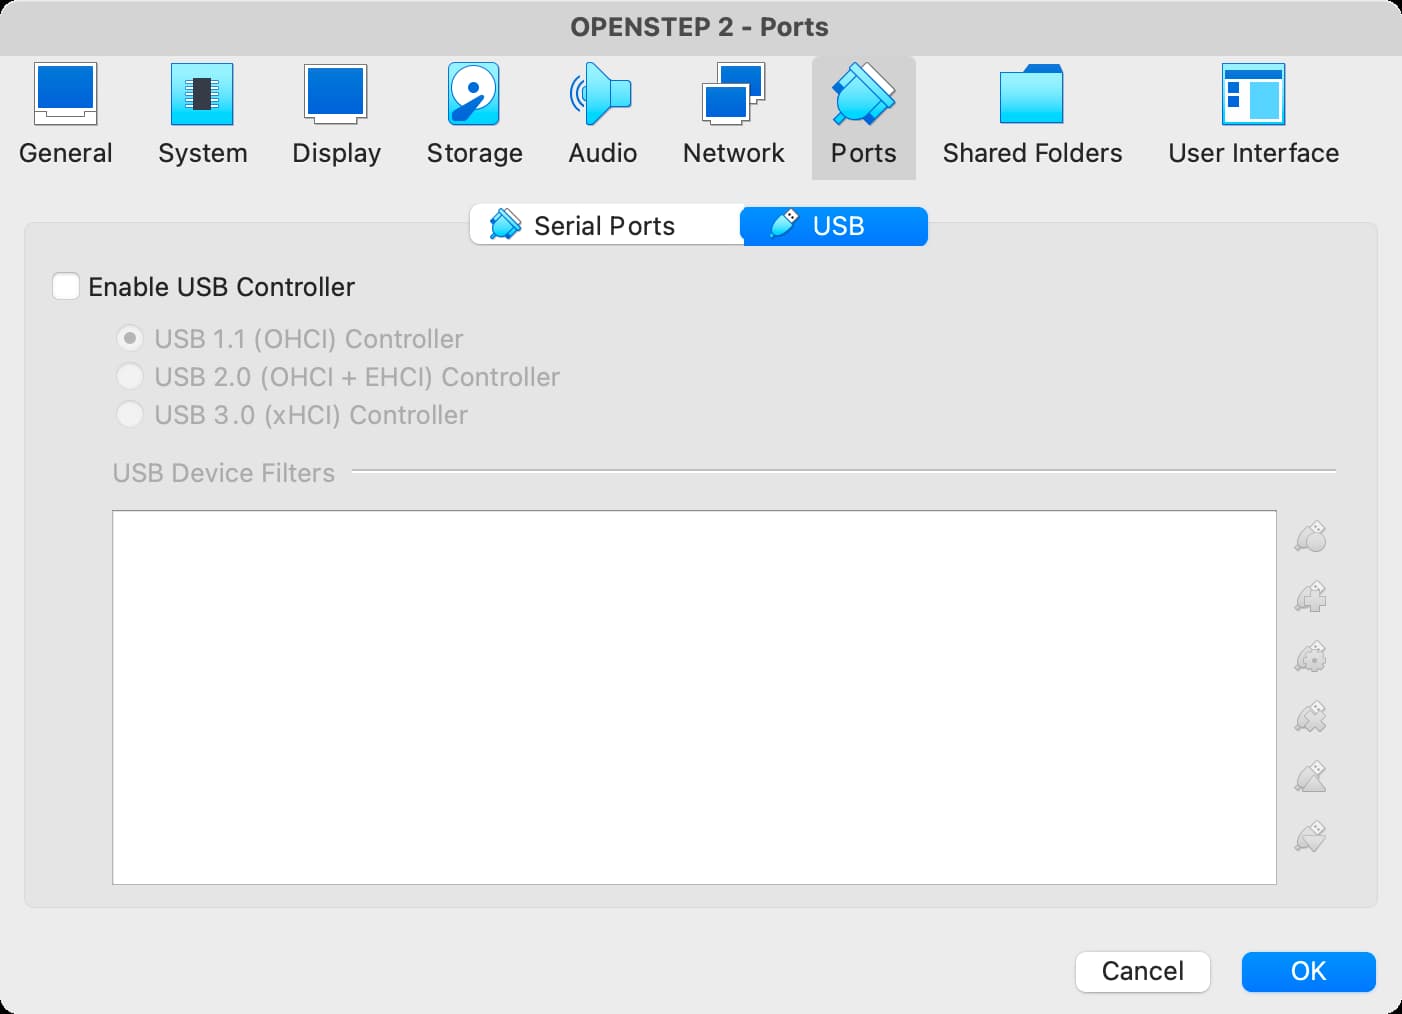
To deactivate USB, click the Ports icon then the USB tab, then uncheck “Enable USB Controller”.
This covers all the VirtualBox settings you’ll need to do. If you continue along in the Adafruit tutorial, you should be set to run OPENSTEP 4.2 in a virtual machine!