I have kids who are 7, 5, and 2 years old, and we were talking about how you can mix colors to produce new colors. Instead of just explaining to them how red, green, and blue colors mix on computers, I decided I wanted to make a simple program where they could adjust sliders to change the amount of red, green, and blue and see the resulting color right away.
When I was thinking about how to build this educational tool for my kids, I immediately thought of Smalltalk, with its origin in teaching children about computers, and Squeak, an open-source dialect of Smalltalk that continued that legacy. I’ve been trying to learn Smalltalk, and this seemed like a great opportunity to try it out on a real, small app.
There’s one additional tool for Squeak that I thought would help as well: Morphic Designer, an application for creating user interfaces via drag-and-drop.
Let’s walk through the steps below to create this application.
One important note before we start: if you’ve never used Smalltalk before, I recommend that you first read the first few chapters of the free e-book Squeak by Example (available from the Squeak Documentation page). Smalltalk is pretty different from just about any other programming language in that you can’t really separate the language from the dynamic environment it runs in. This post will explain a little as we go, but it’s not a full introduction to the Squeak environment.
Setup
Go to the Squeak home page and download the copy of the latest version of Squeak for your OS. (The latest version as of this writing is 5.3, and I’ve confirmed it works with Morphic Designer.) Install and run Squeak in the way appropriate for your OS. For example, I’m on macOS, and the downloaded file is a disk image file. When I double-click it, a virtual disk is mounted with an application icon titled “Squeak5.3-19435-64bit”. I copy that icon to my hard drive, then double-click it.
The Squeak interface opens, including a prompt to “Configure” or “Skip”.
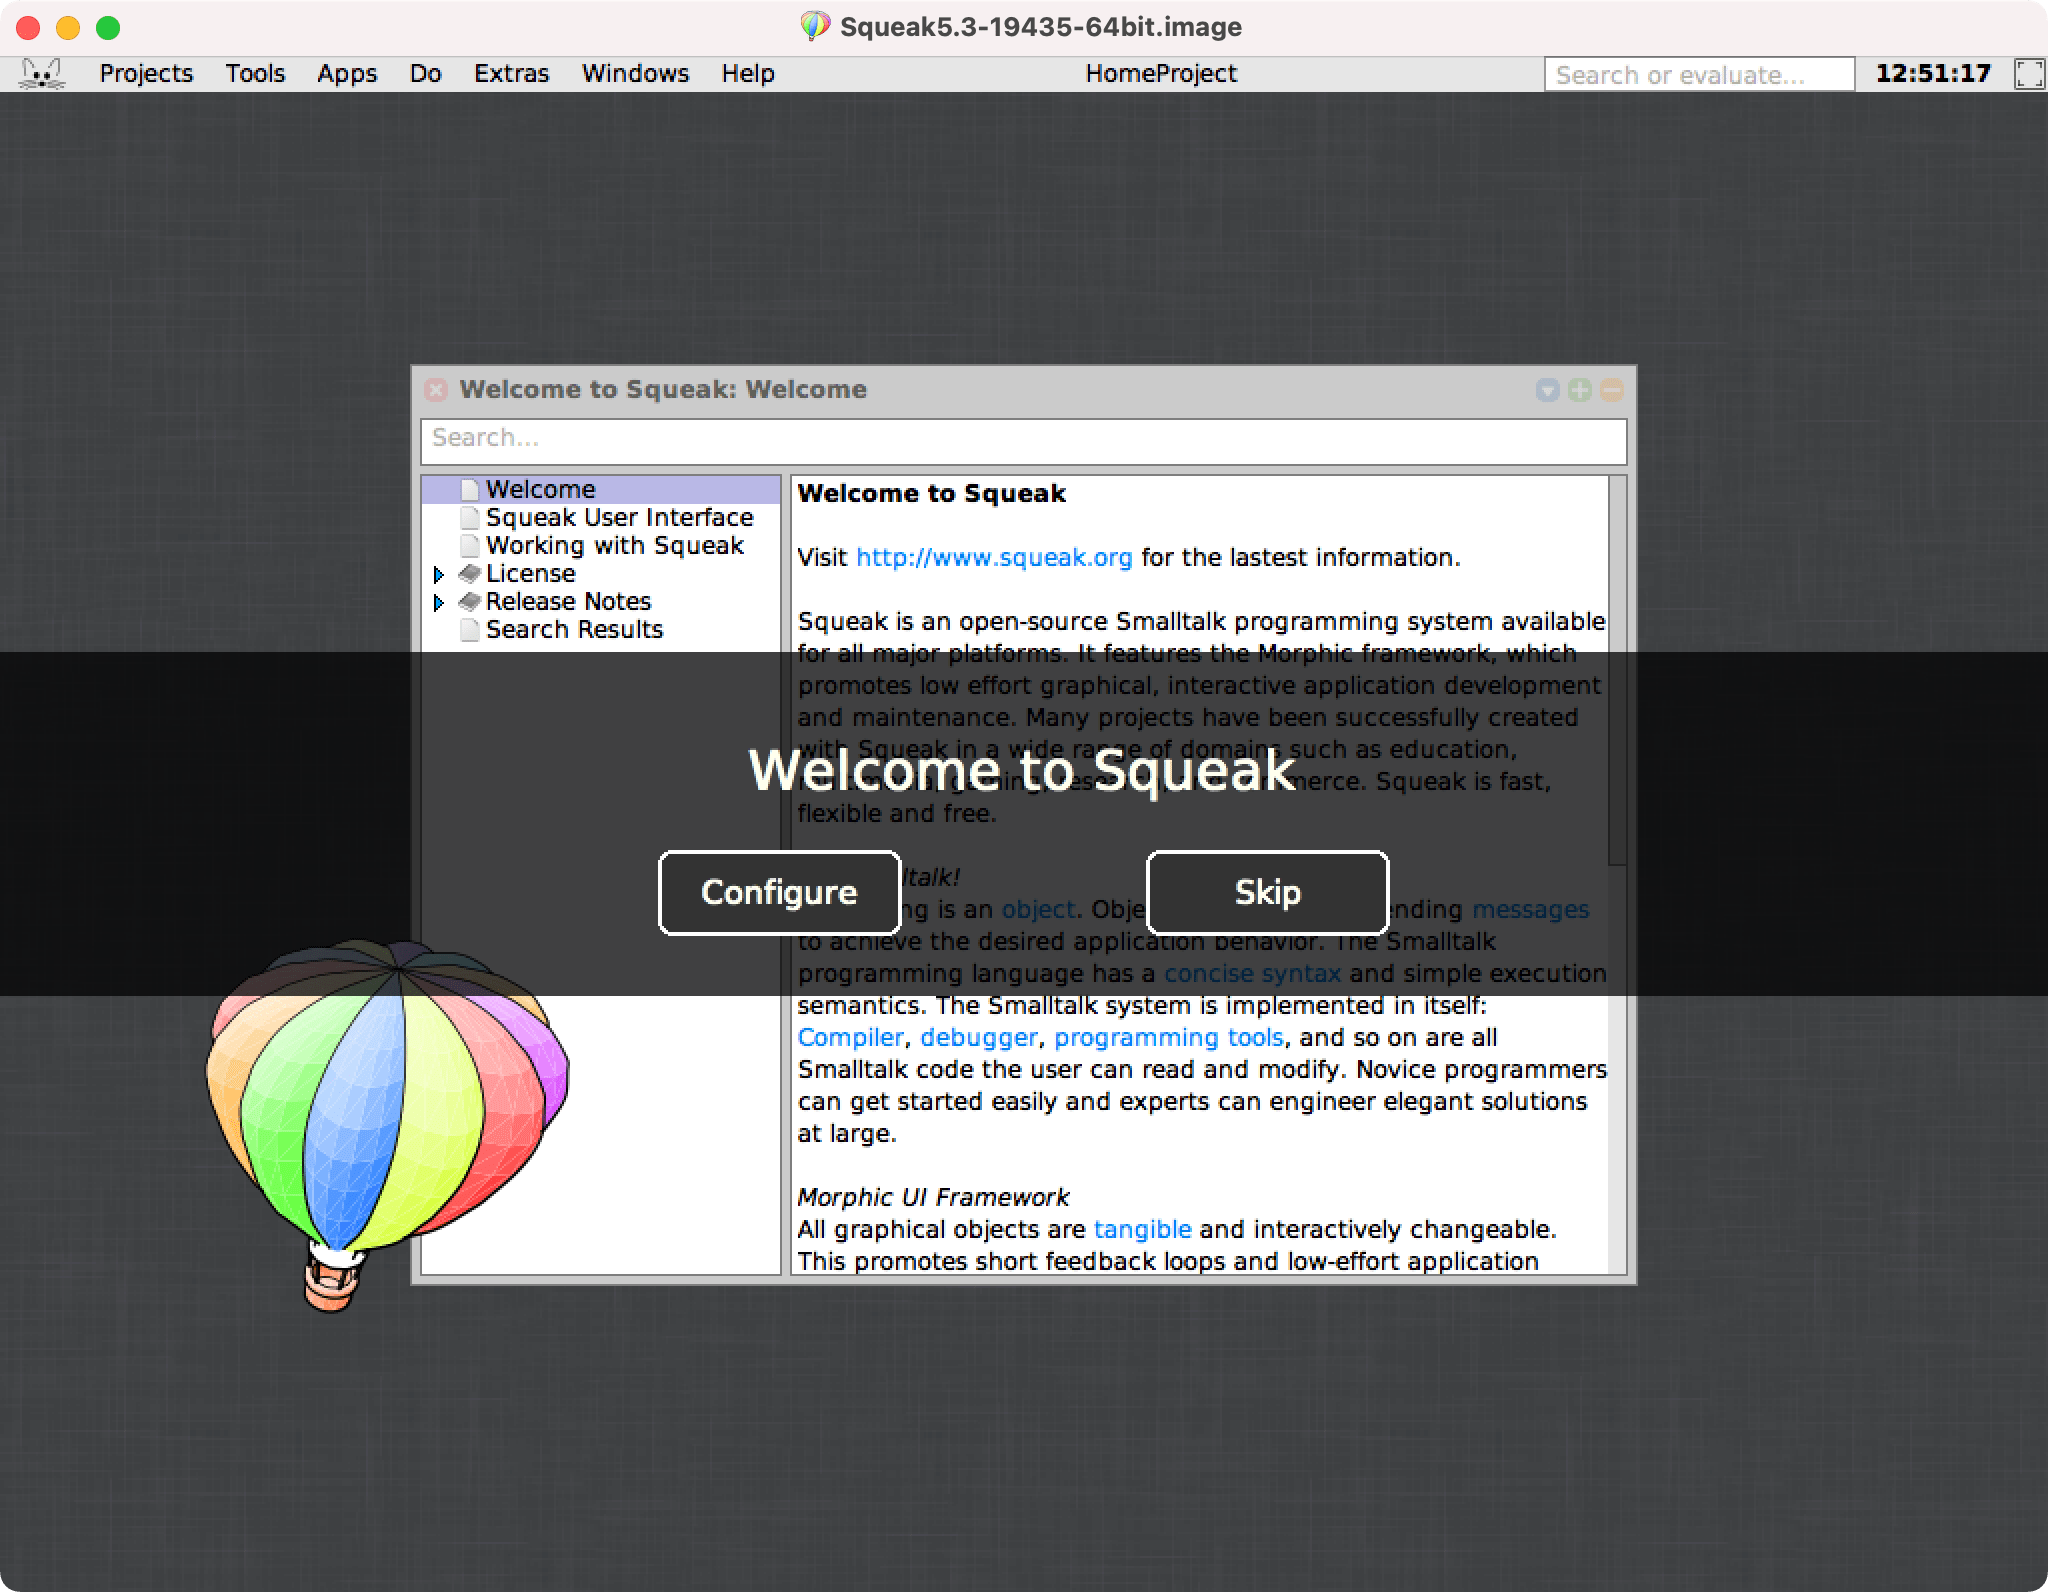
Choose “Configure”—this is necessary to install some dependencies we’ll need.
You’ll see “Previous” and “Next” buttons with a “1 / 6” indicator showing that there are six steps to the customization process.
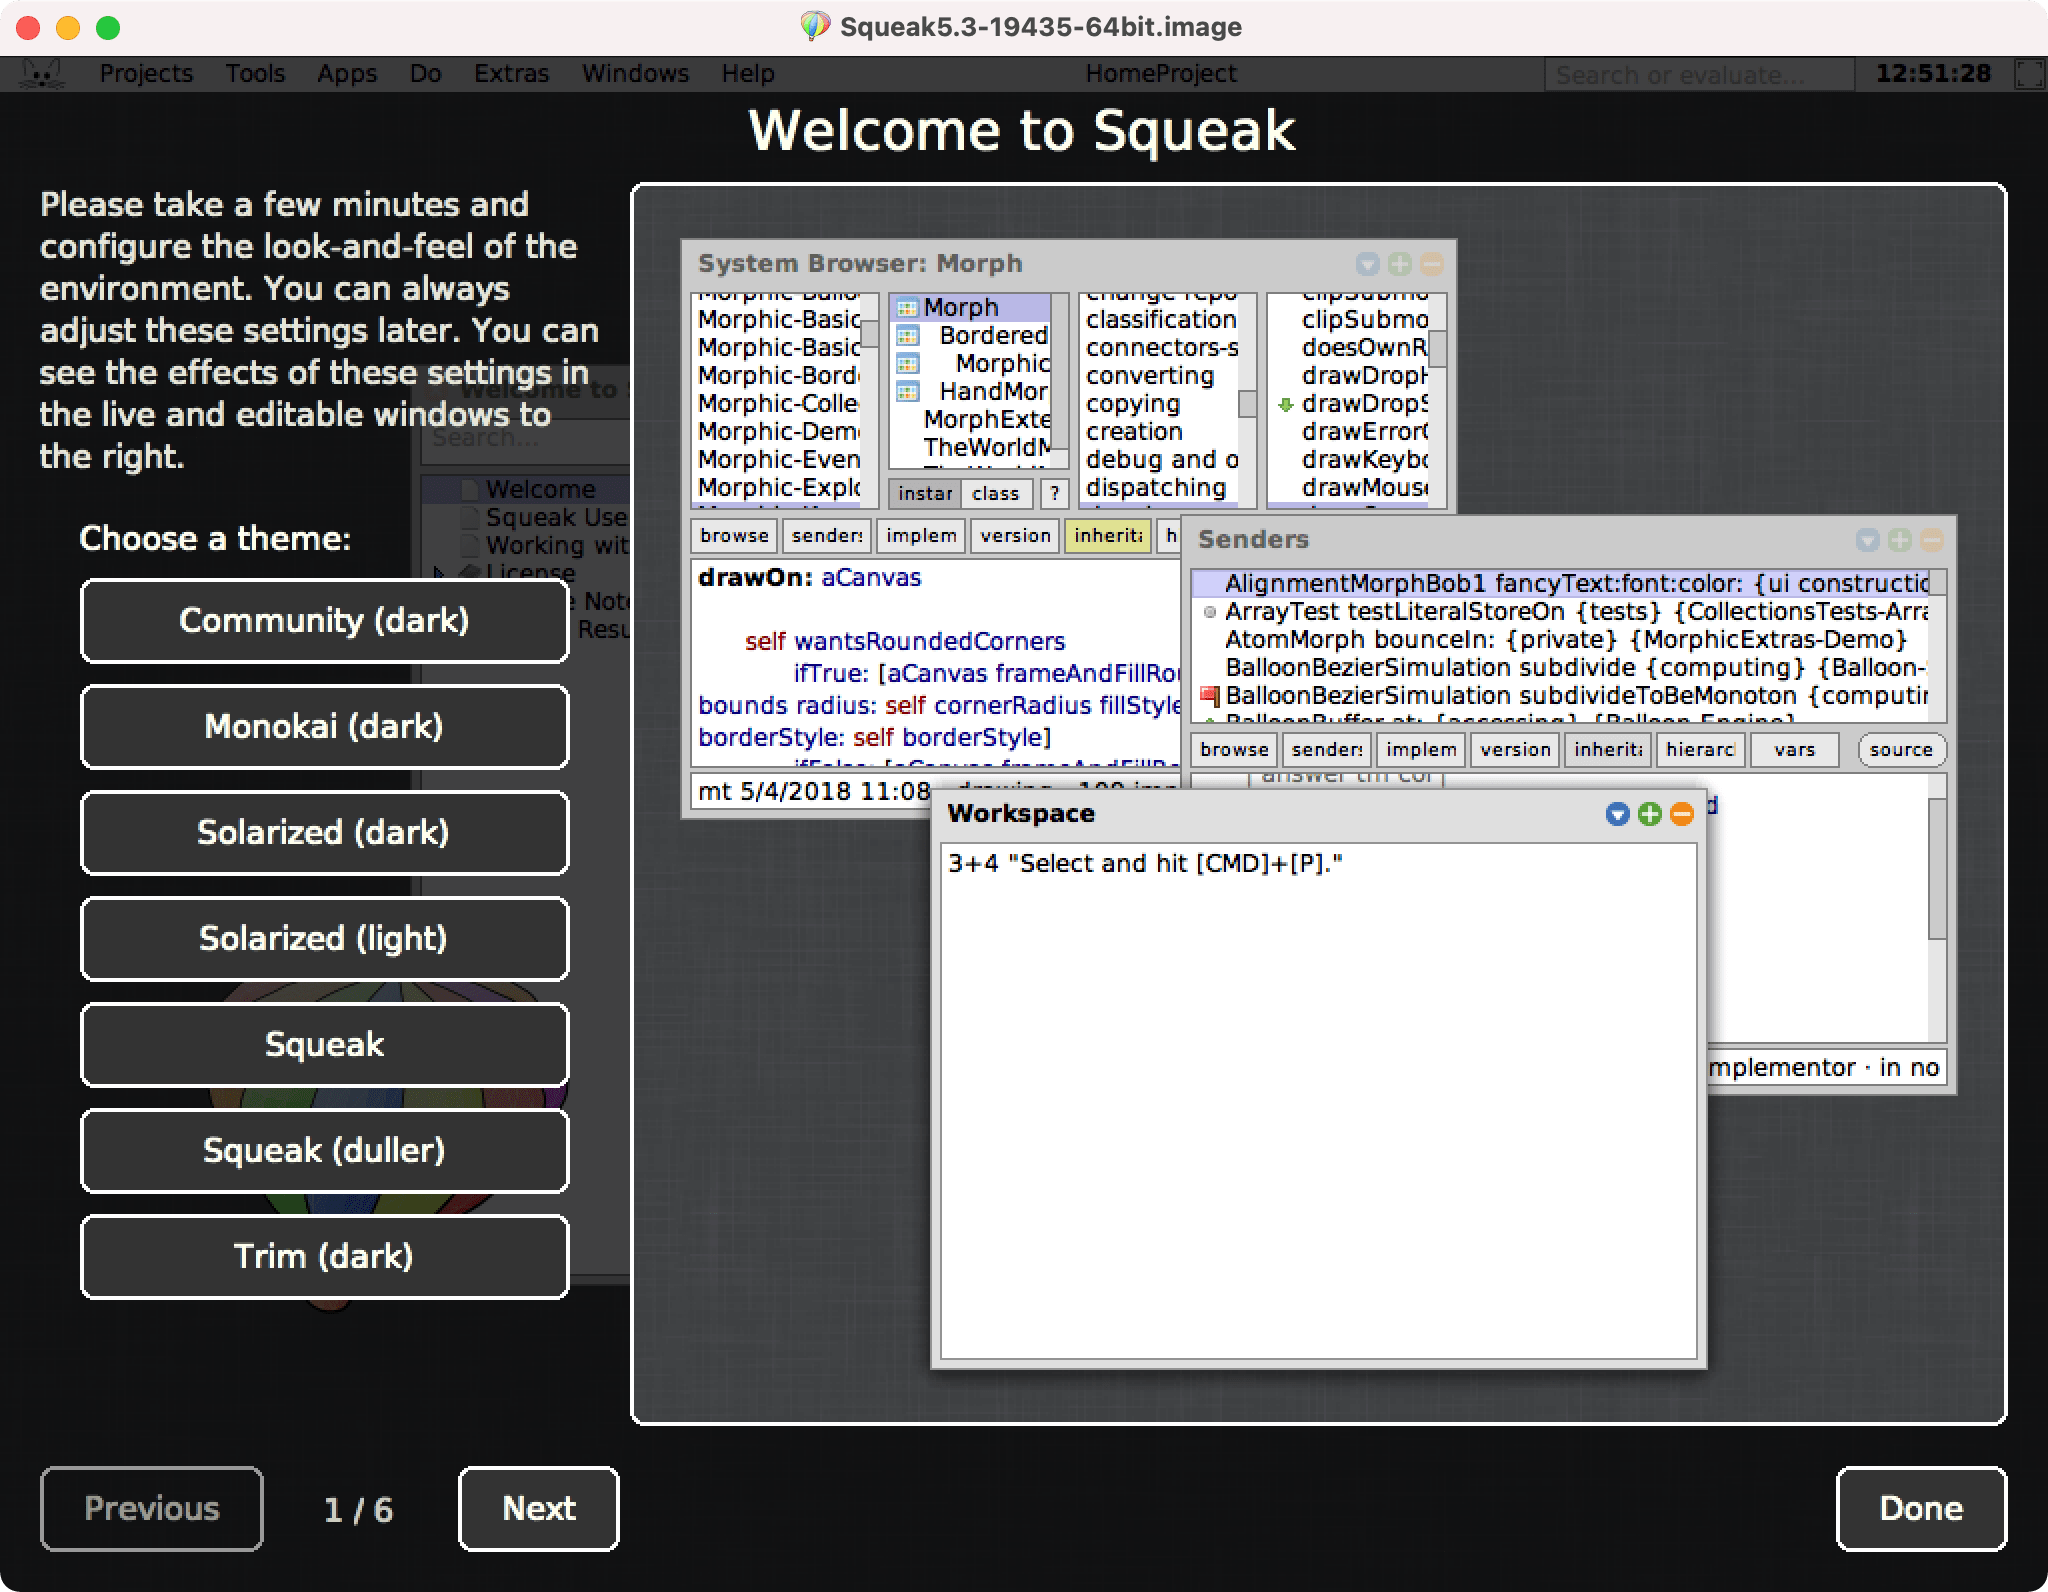
Feel free to customize these settings or leave them as-is. When you’re done, click “Done”.
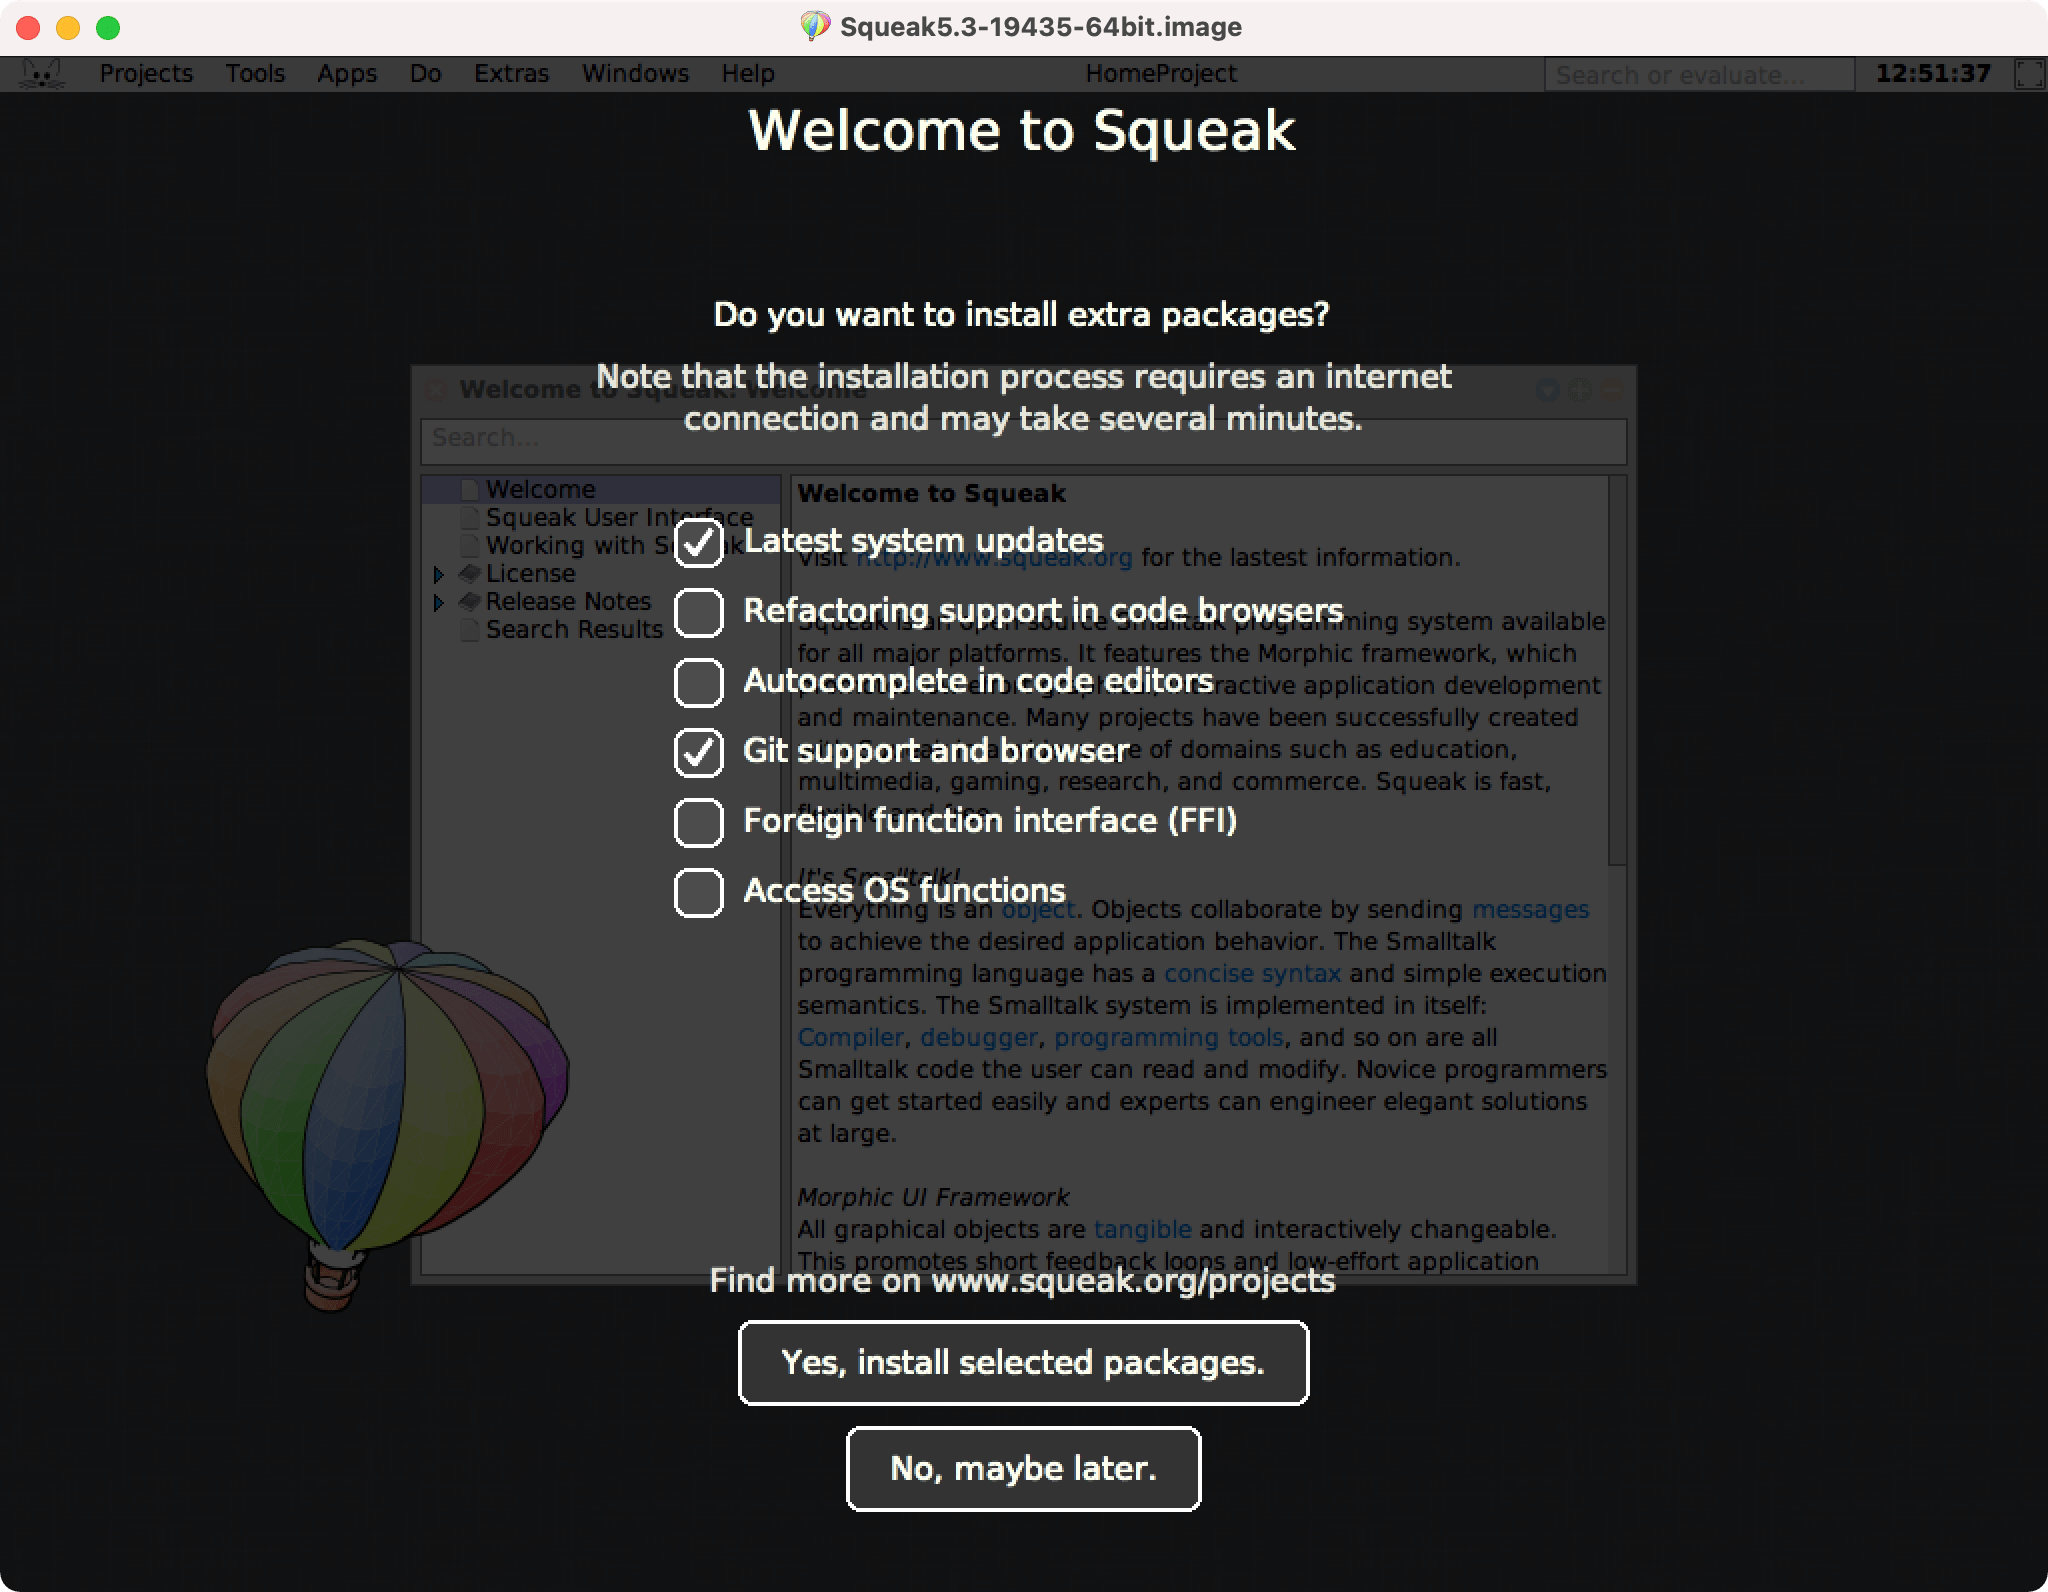
Next, you’ll see the question “Do you want to install extra packages?” with a checkbox list, and “Latest system updates” should be checked. Leave it checked, and click on “Git support and browser” to check it as well. Then click “Yes, install selected packages.”
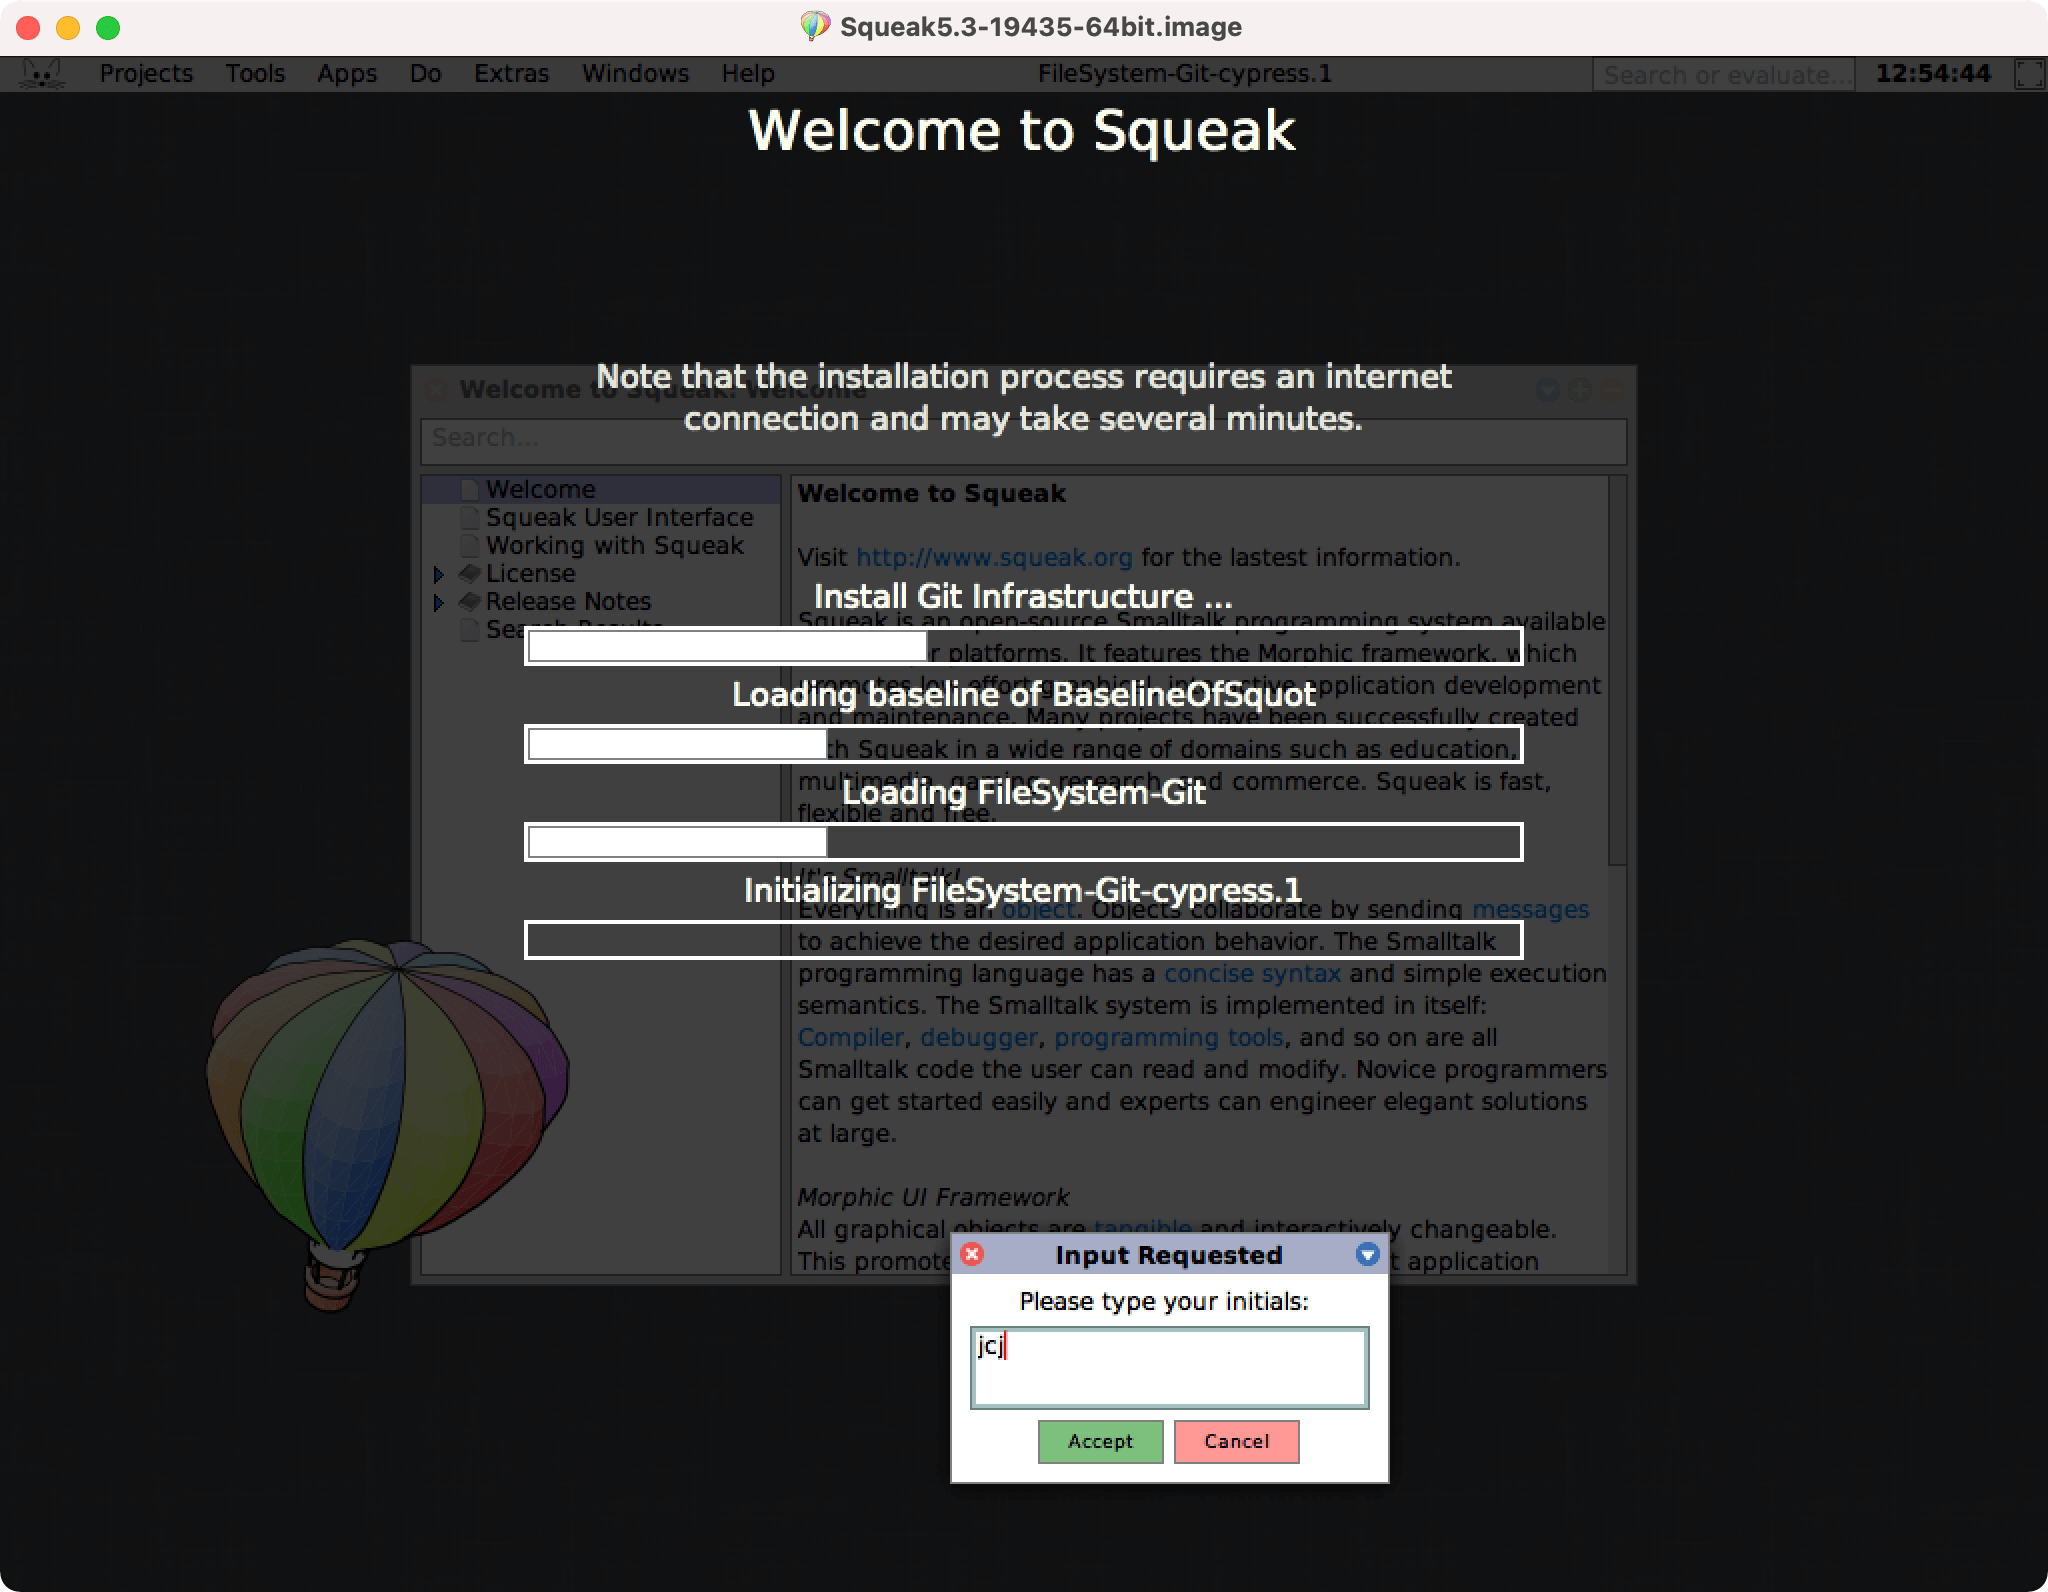
You’ll see a series of progress bars that will take a few minutes to complete. Almost at the end, you’ll be prompted for your initials—these are used by the git tooling to record who made changes. Although we won’t be using git in this tutorial, we still need to enter them to get past this step. Enter your initials then click “Accept”.
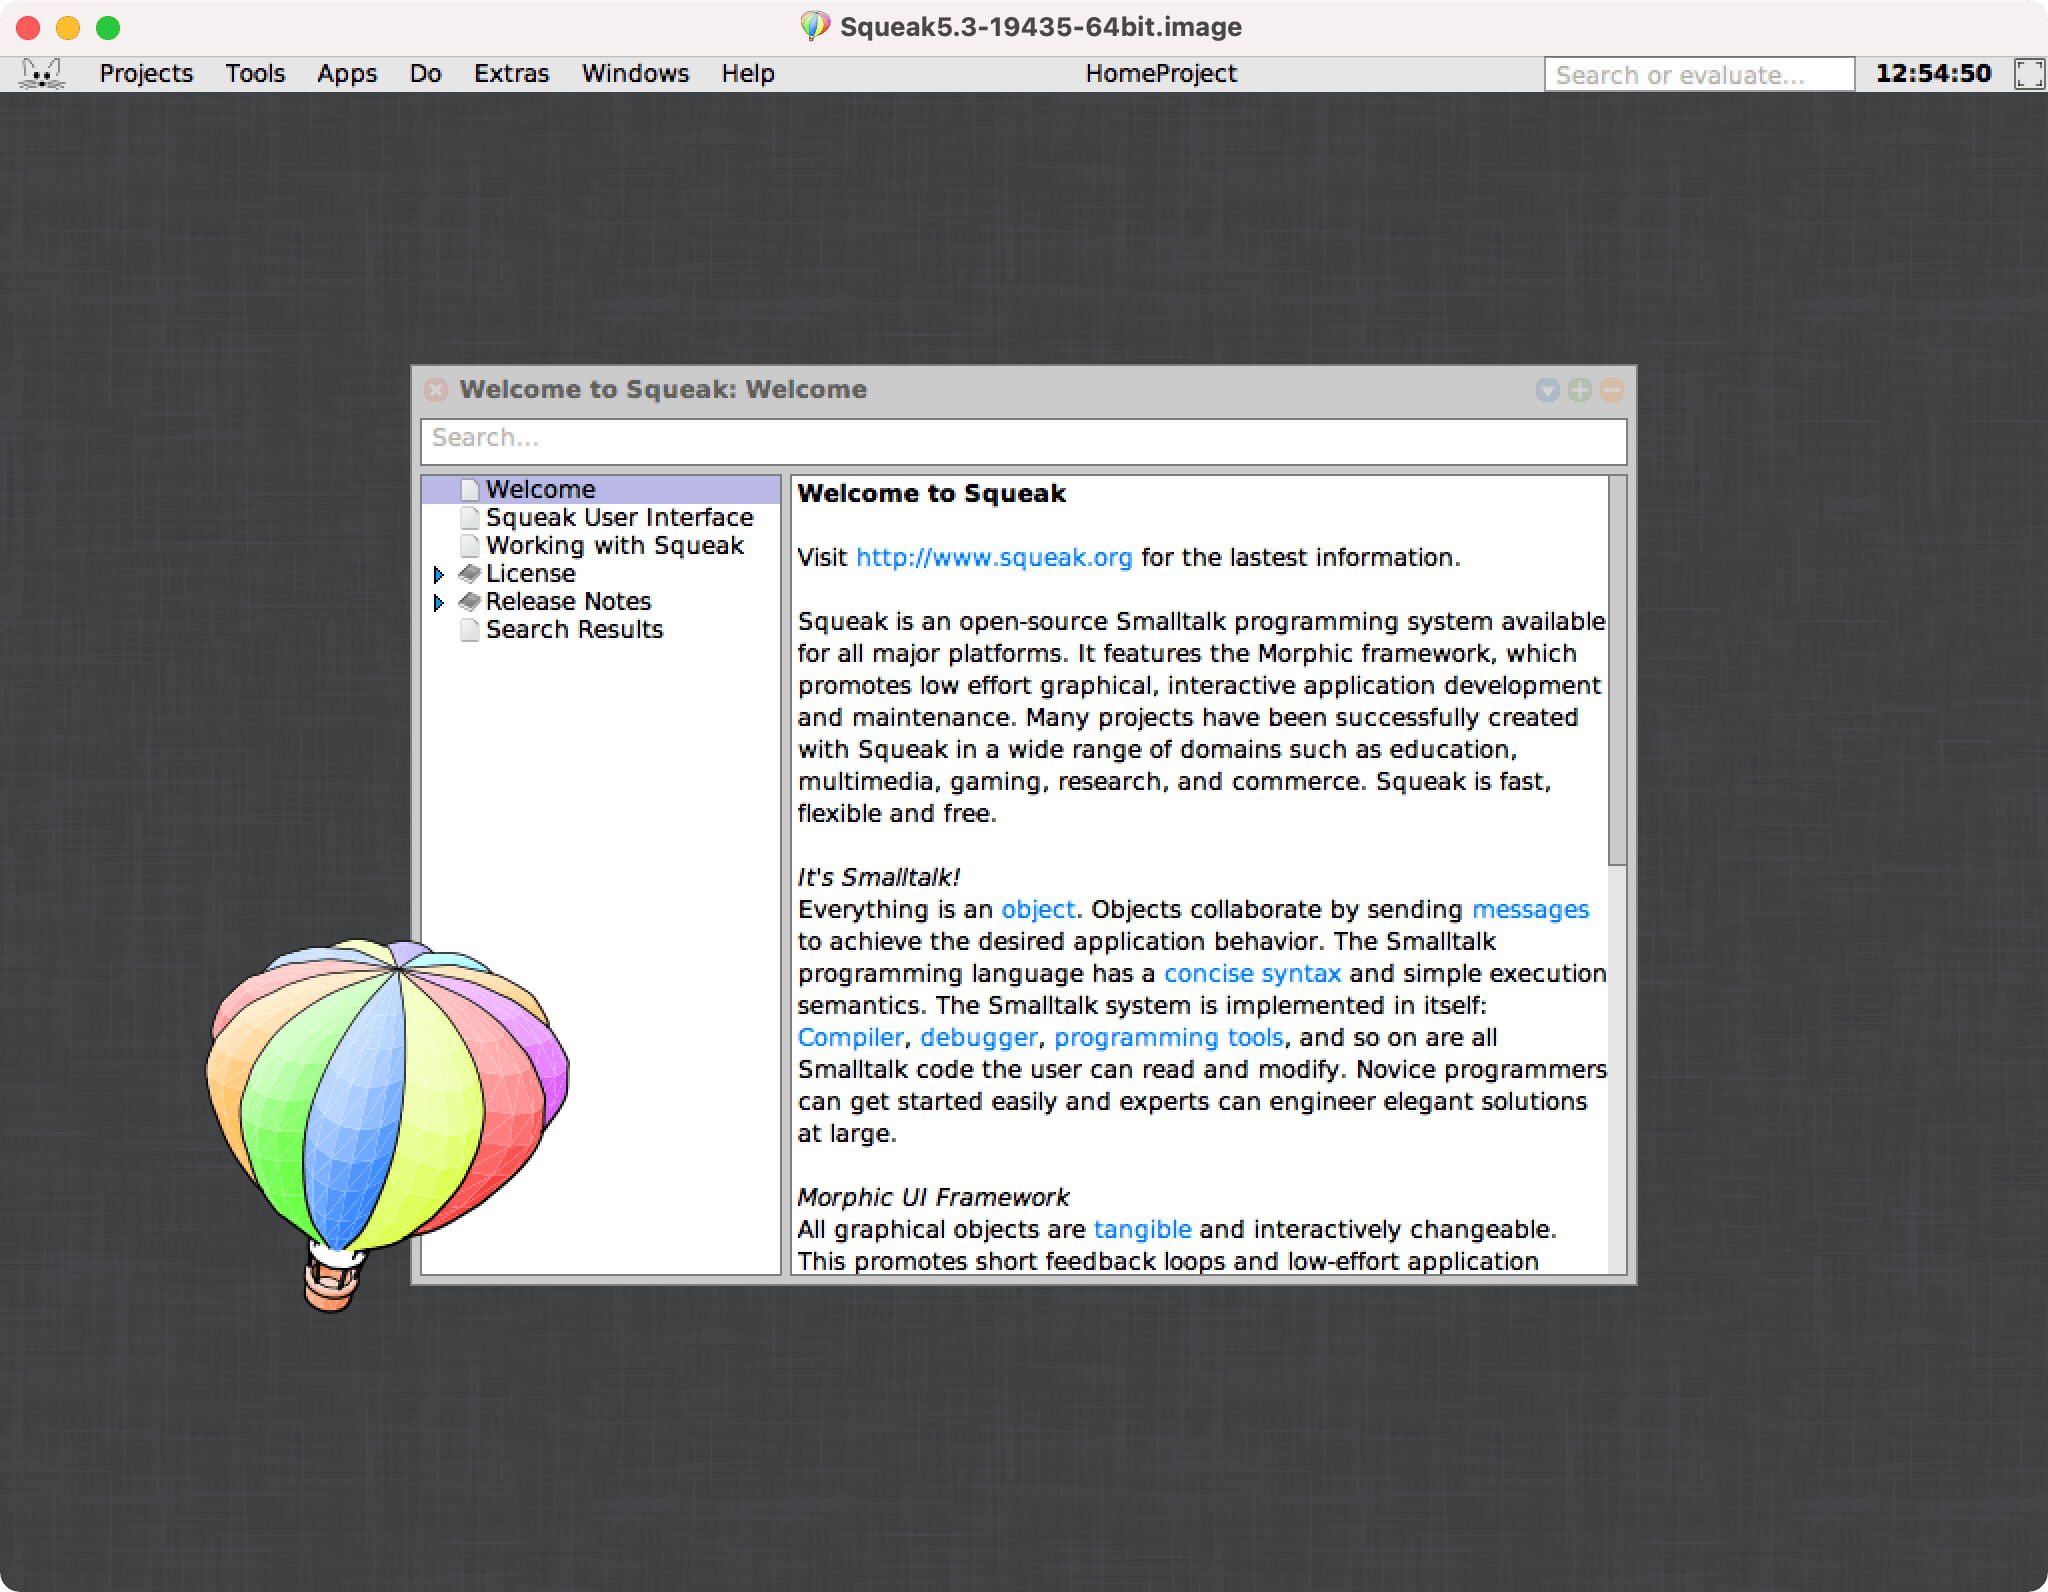
After a few more seconds the progress bars will go away and you’ll be left with the “Welcome to Squeak” window. Feel free to read it or go ahead and close it.
Click the dark gray background of the window and a “World” menu will appear.
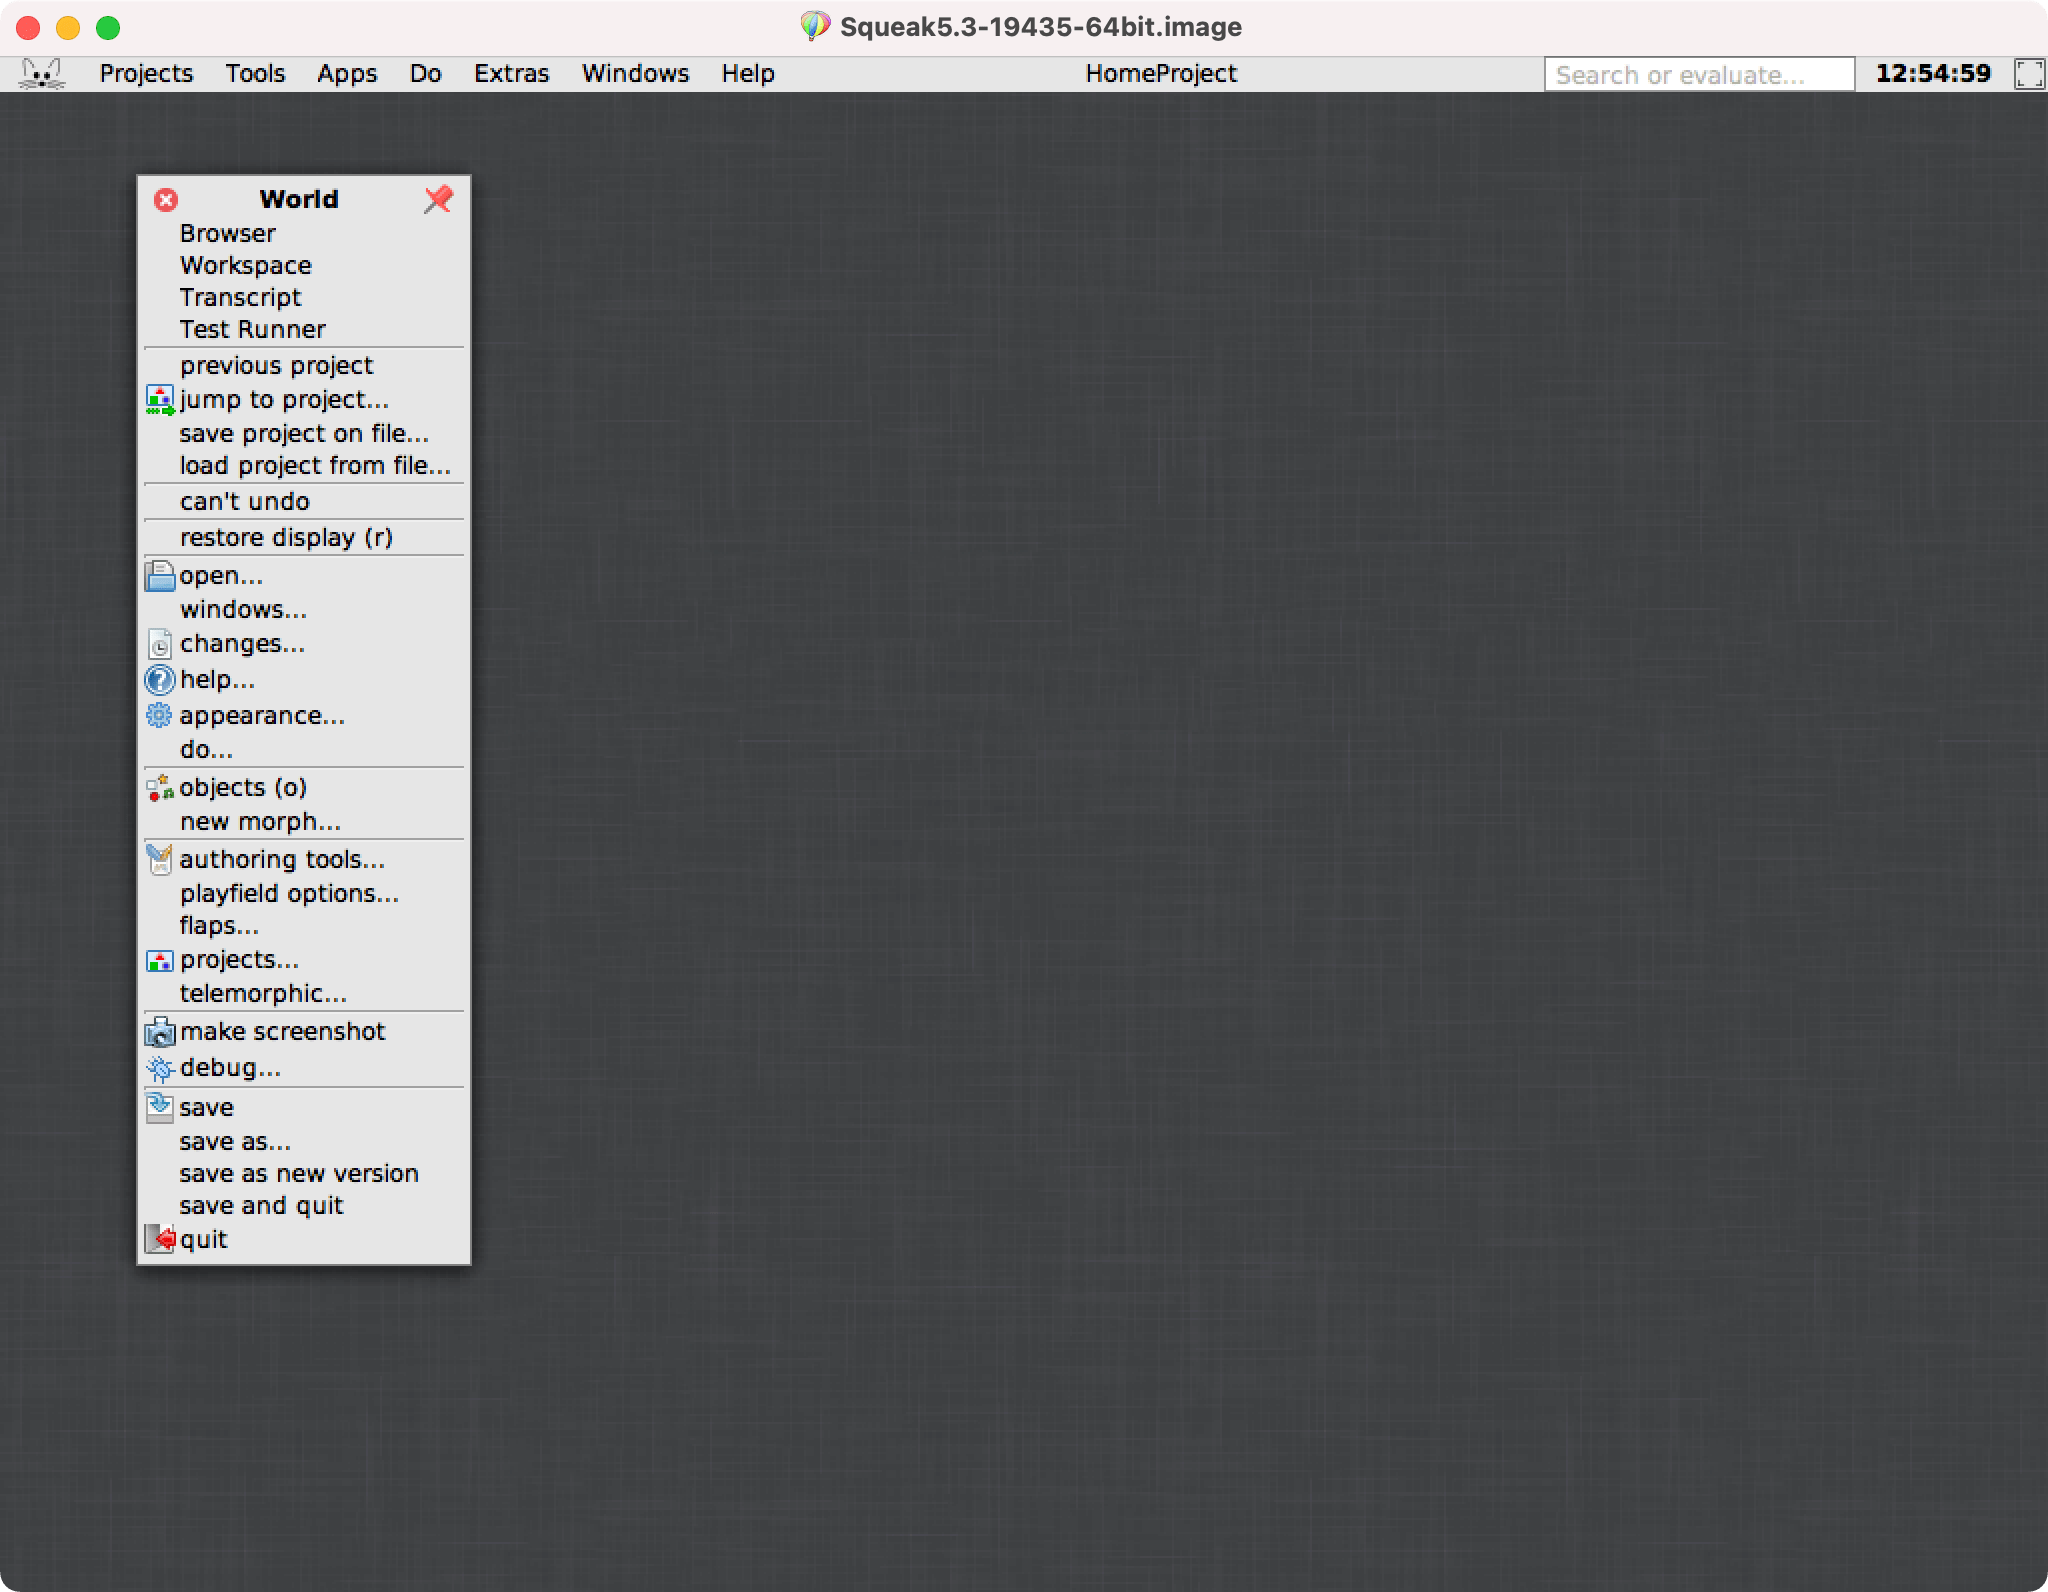
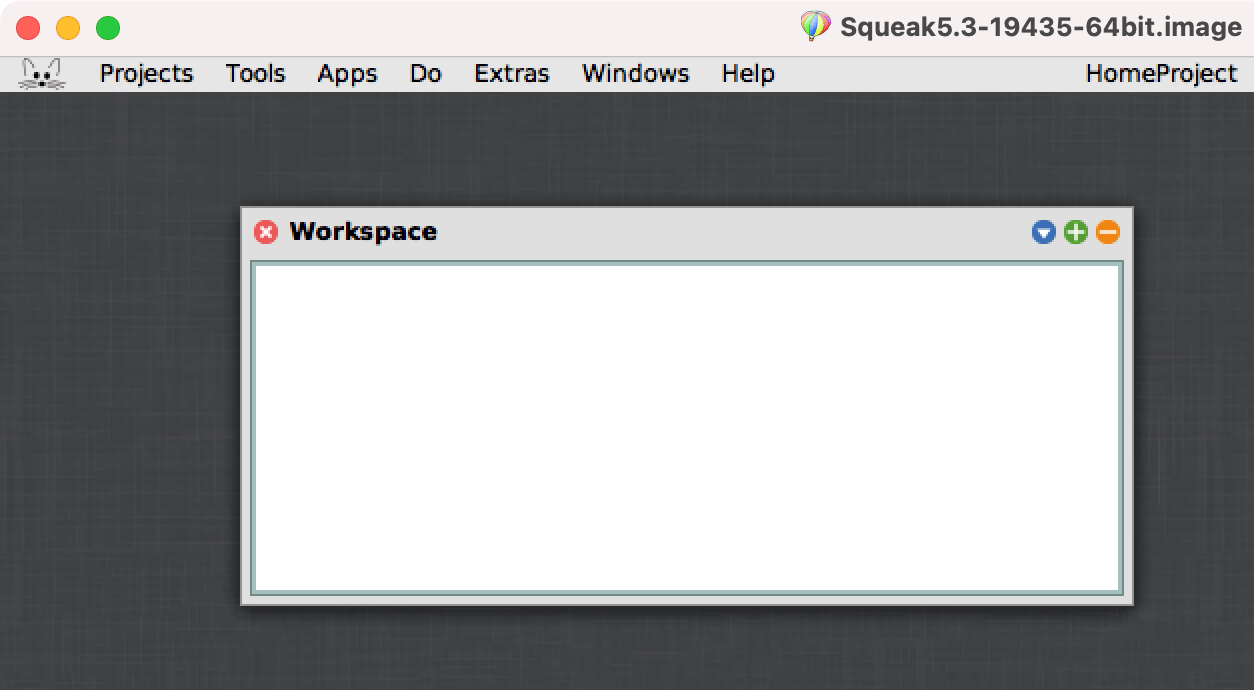
From that menu, choose the “Workspace” option. A text entry window will appear.
Next we’re going to install Morphic Designer, a tool for visually creating user interfaces. Here are the instructions to install and run Morphic Designer from their home page.
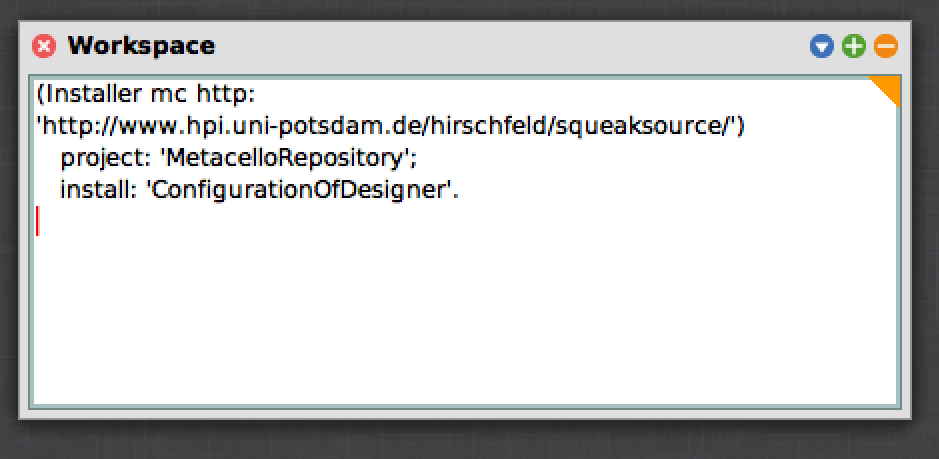
First, paste the following code into the workspace:
(Installer mc http: 'http://www.hpi.uni-potsdam.de/hirschfeld/squeaksource/')
   project: 'MetacelloRepository';
   install: 'ConfigurationOfDesigner'
Select all of it, then right-click on the window. Choose “do it (d)” to execute that code.
A window with a progress bar will appear. When it disappears, replace the code in the Workspace with the following:
(Smalltalk at: #ConfigurationOfDesigner) load
Once again, select all of it then right-click on the window and choose “do it (d)”. (The keyboard shortcut to execute code in a Workspace on macOS is Command-D; if you’re running Squeak on another OS it’s probably something similar.) This time a window with several progress bars will appear.
When the progress bar window disappears, Morphic Designer should be installed. To try it out, replace the code in the Workspace with the following:
UiDesigner open
Then select it and do it (via the menu or keyboard shortcut).
A “Morphic Designer” window should appear, with an option to “Open Design…” or “Create Empty Design”.
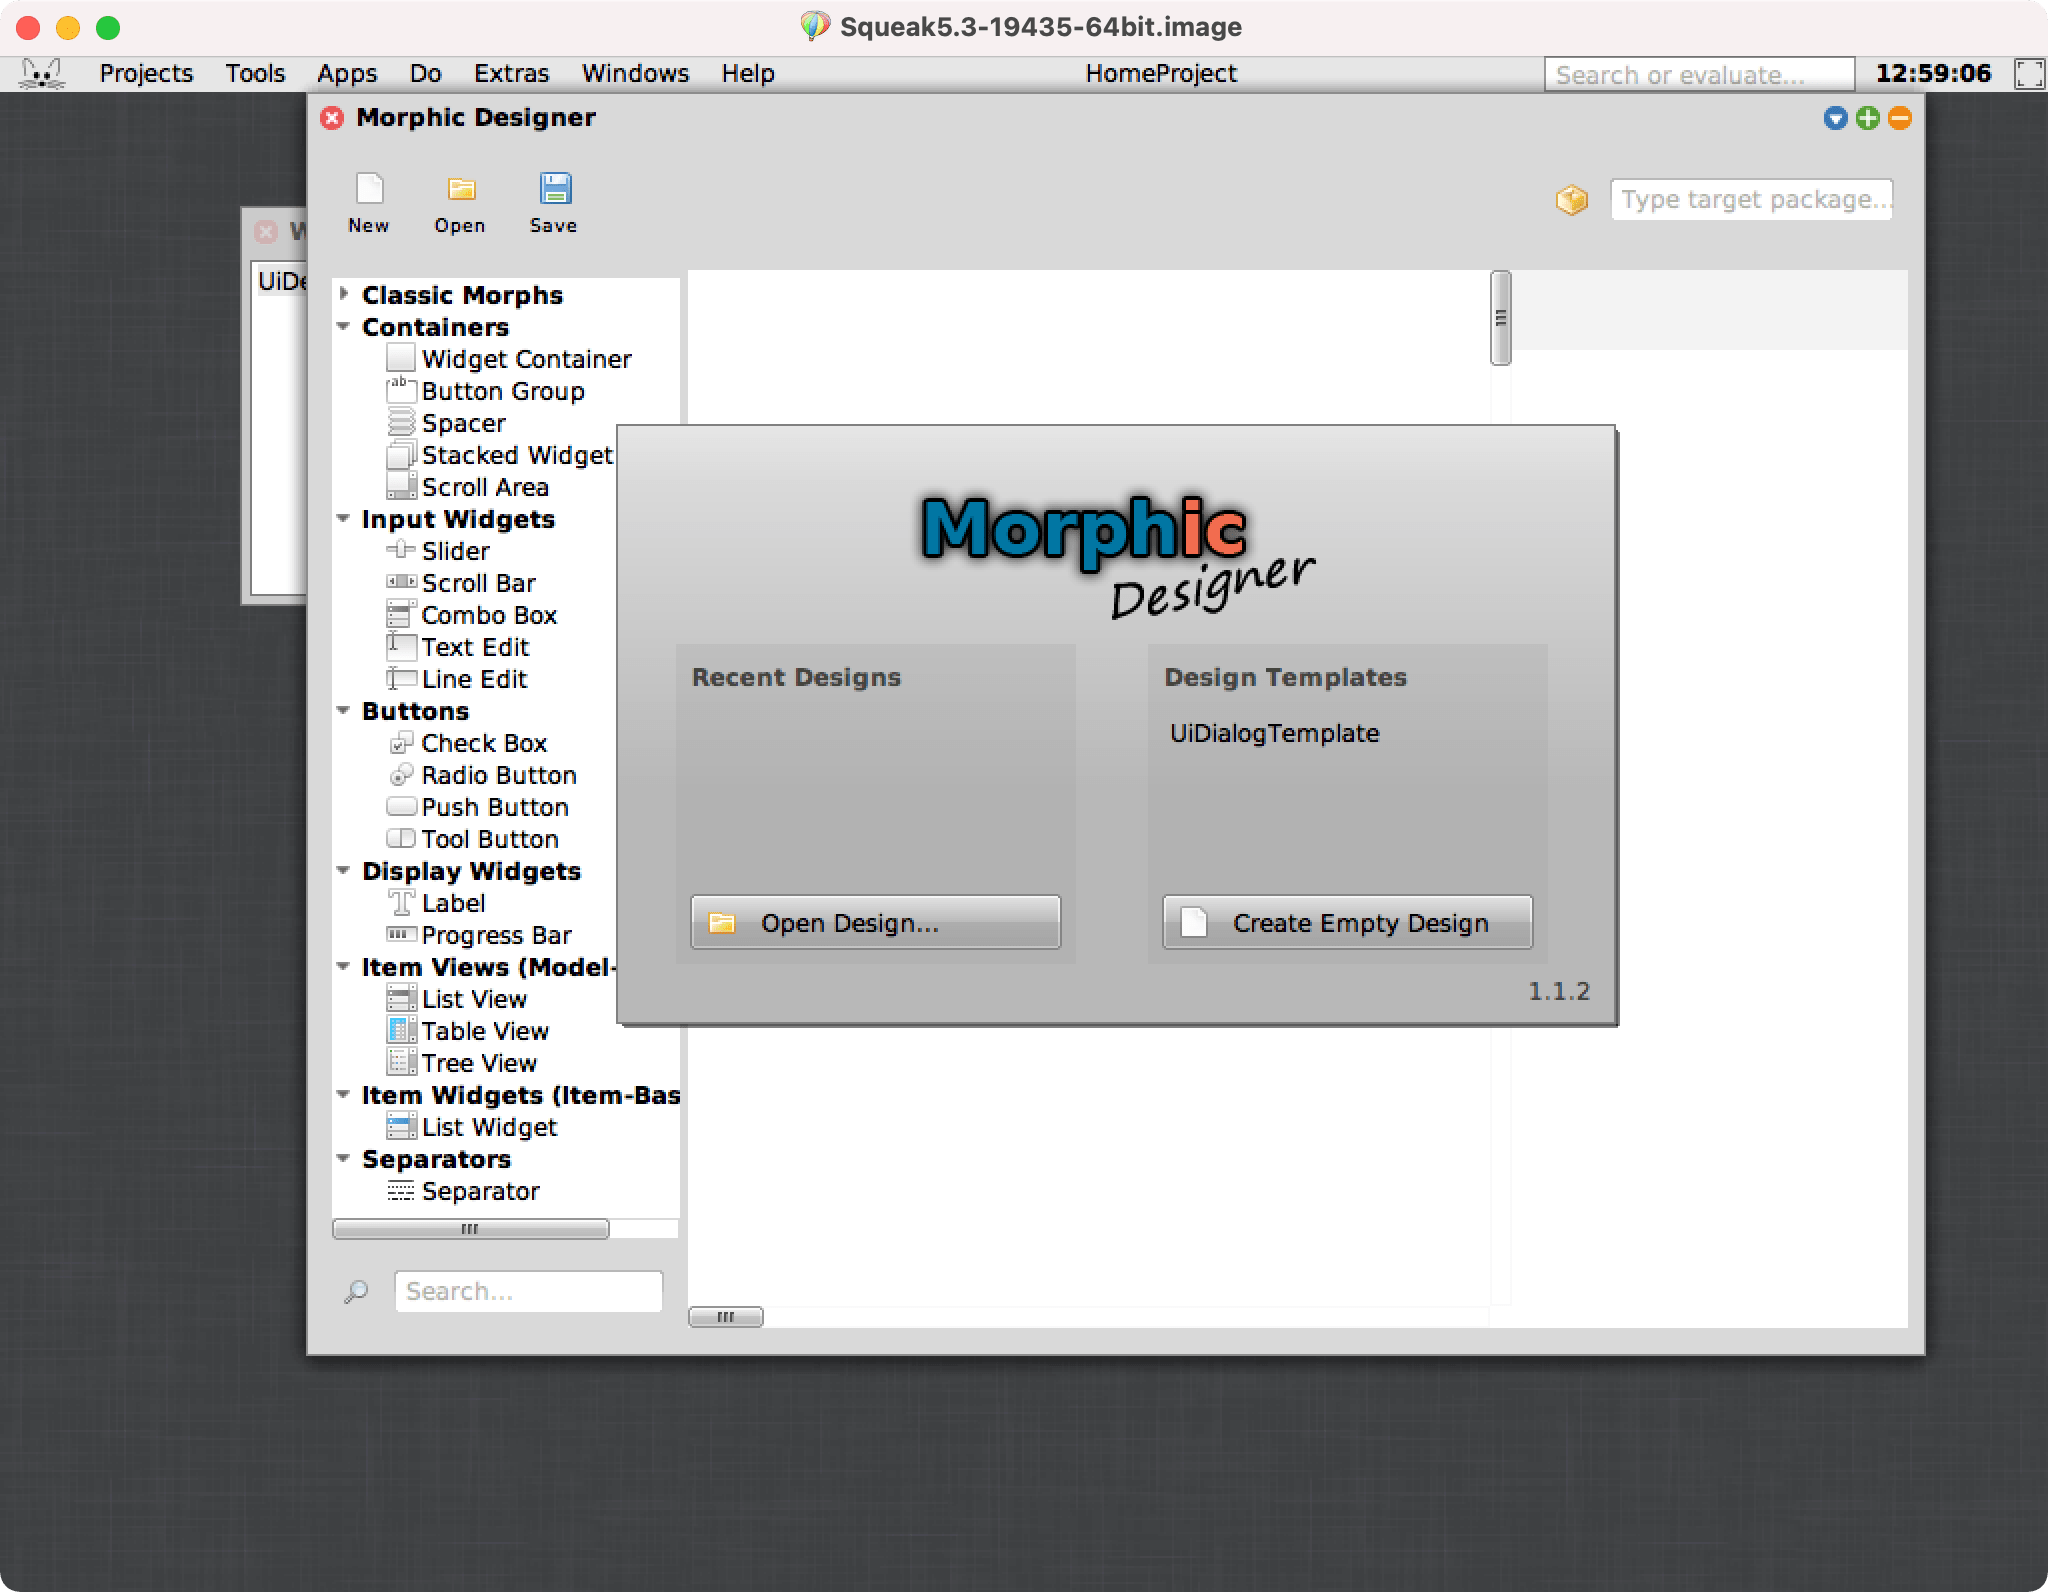
Creating the UI
We’re creating a new app, so choose “Create Empty Design”.
You’re given a window titled “Morphic Designer - ‘Unknown’” with a toolbar on the top and sidebars on the left and right. At the top-right of the window, click the green button with the plus icon. This will increase the size of the window to fill most of the Squeak interface, to give us more room to work.
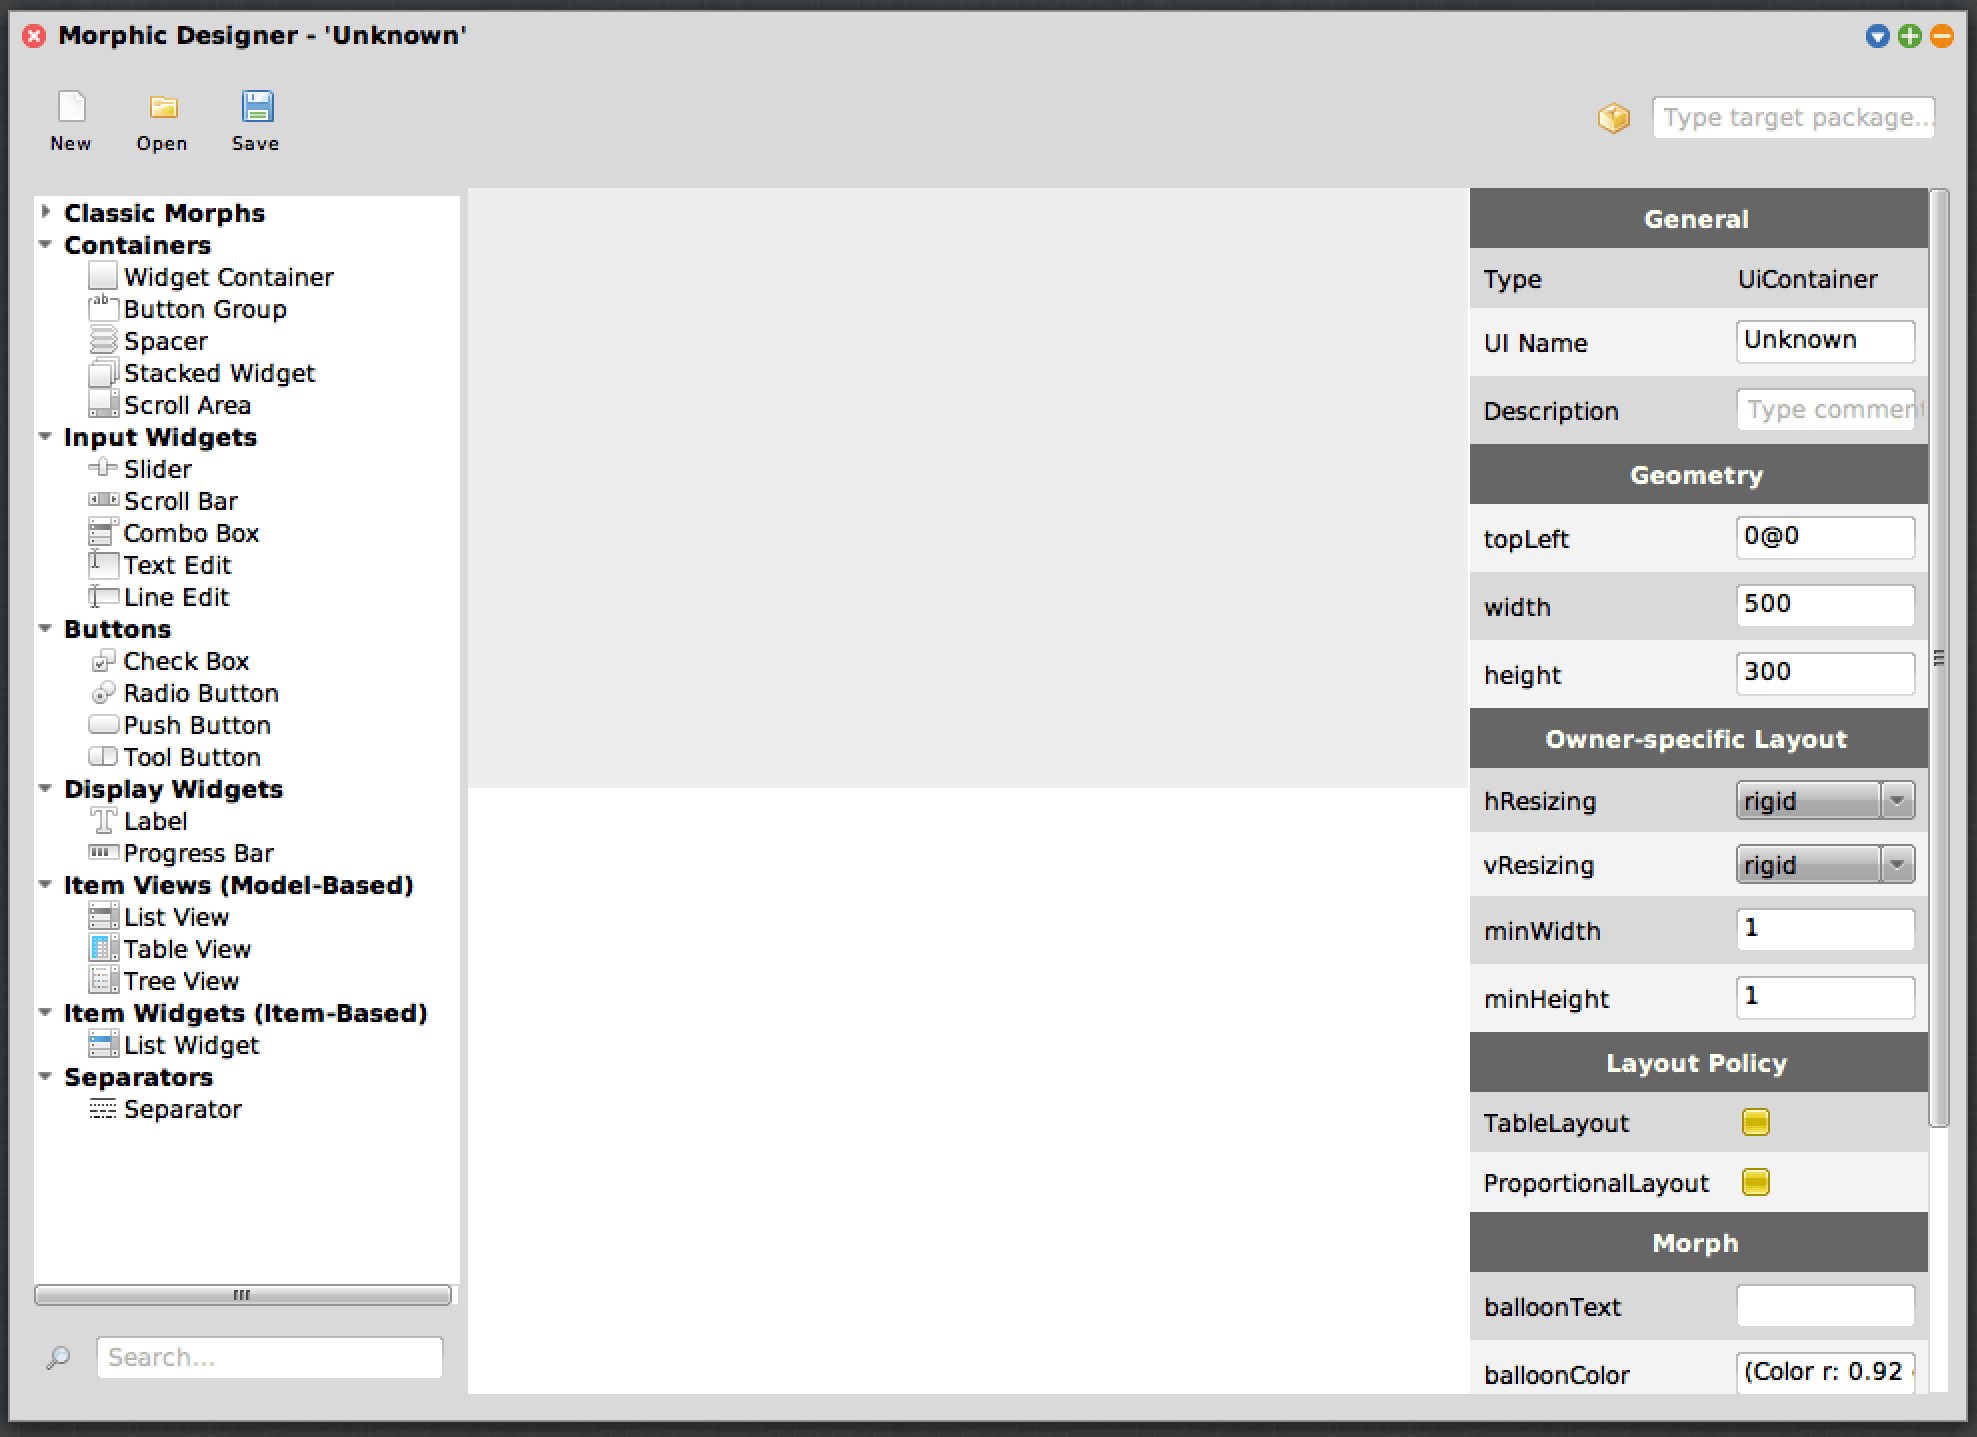
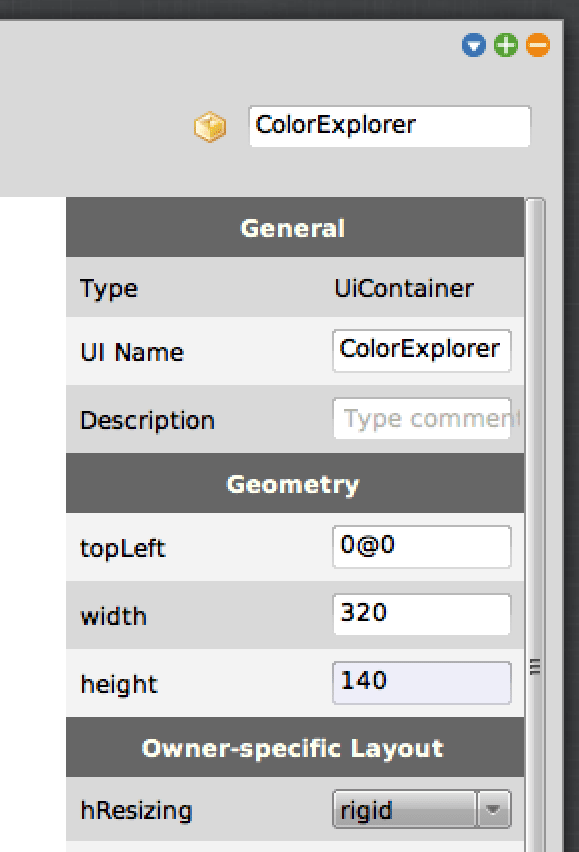
In the top-right of the window is a text box that says “Type target package…” Click in this text box and type “ColorExplorer”.
Next, in the right-hand sidebar, find the first section, titled “General”. Under it, the second row is “UI Name”, with a default value of “Unknown”. Replace that text with “ColorExplorer” as well.
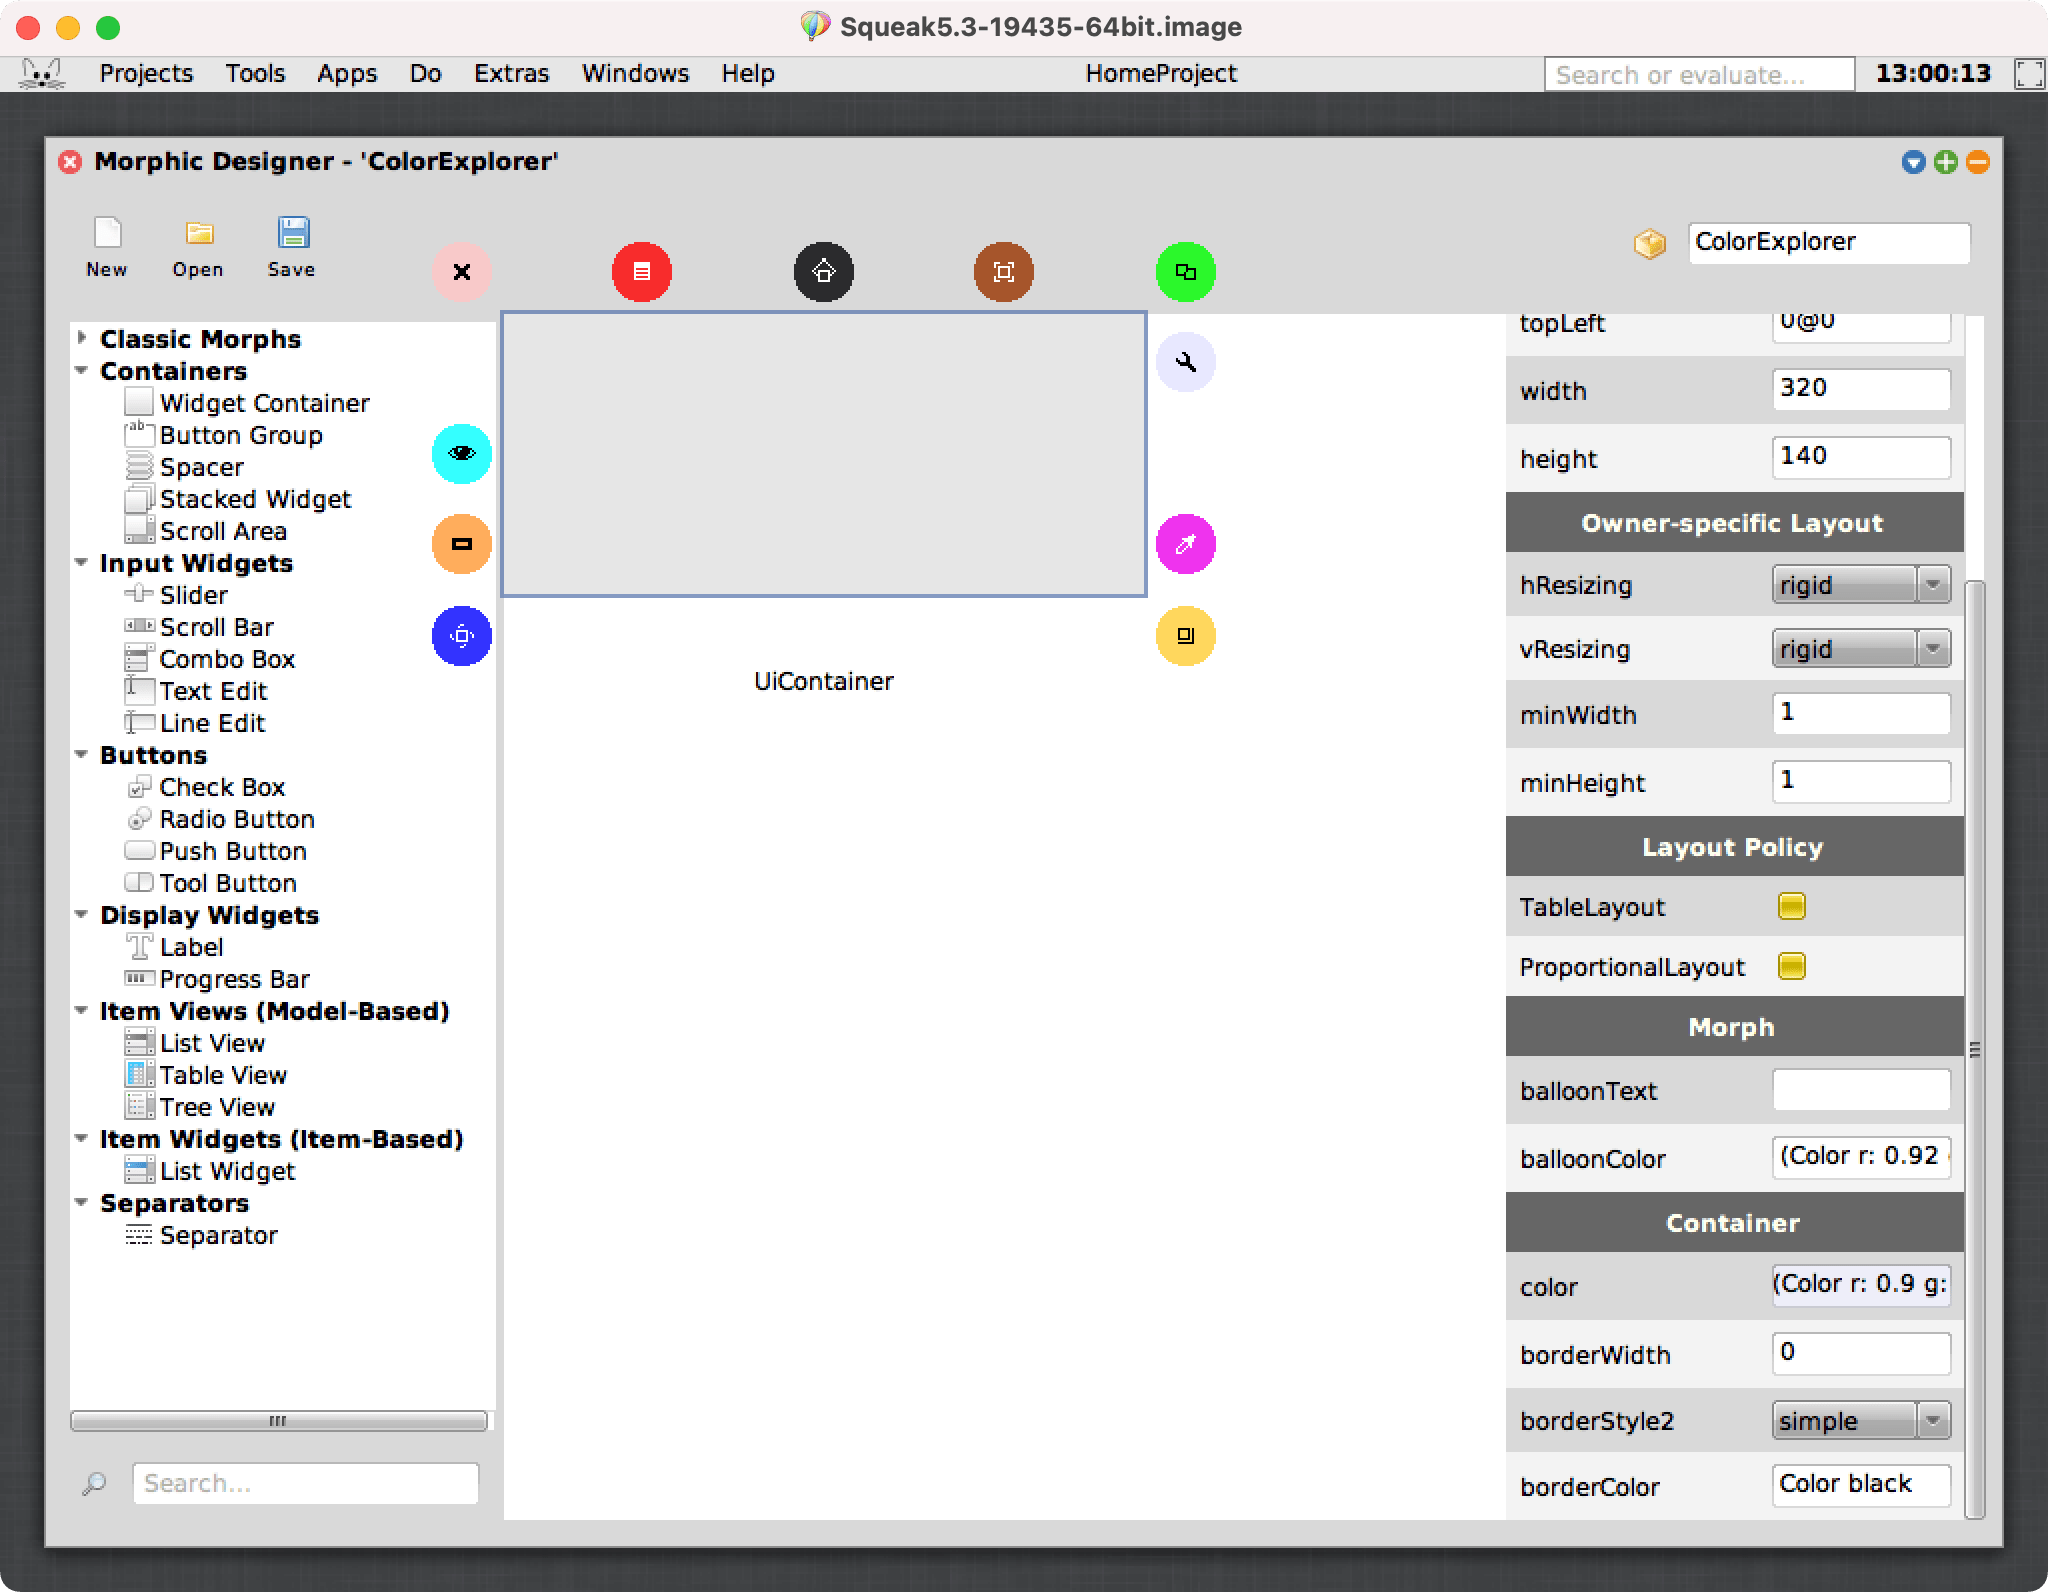
The next section in the sidebar is “Geometry”. In that section, change the width to 320 and the height to 140. As you change those values, the size of the gray box on the left will change. That’s the container your app will go in.
Now, this box appears gray, but it’s actually configured to be transparent, which won’t work for our running application. Click on the gray box. In the right-hand sidebar, scroll to the bottom to the section titled “Container”. The first row says “Color” and the value is “Color transparent”. Change this to “Color gray: 0.9” and press Return. The color the box displays as should change to a slightly darker shade of gray.
Wondering why the text you typed is replaced with “(Color r: 0.9 g: 0.9 b: 0.9)”? Color gray: 0.9 is actually Smalltalk code that sends a message to the Color class: the message gray: with the value 0.9. This creates a Color object with the value 0.9 out of 1 for all colors: a light gray. The canonical representation of this color is (Color r: 0.9 g: 0.9 b: 0.9), so Morphic Designer replaces the text you typed with that.
Next we’re going to add some elements to our interface. In the left sidebar, under “Display Widgets”, you’ll see a “Label” row. Click and drag “Label” from the sidebar into the top-left of the gray box. You should see the text “Label” in the gray box now.
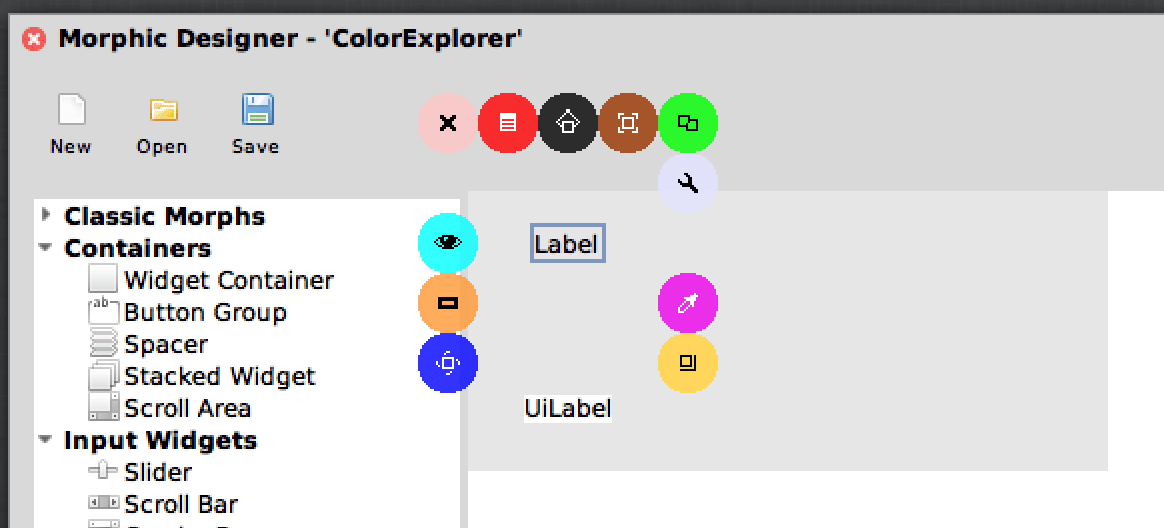
A lot of colored circles appear around the label as well. These are different controls for interacting with morphs, and they’re available all throughout Squeak, not just in Morphic Designer. We won’t be using them as part of this, tutorial, though, so you can ignore them (if it’s even possible to ignore such bright colors!).
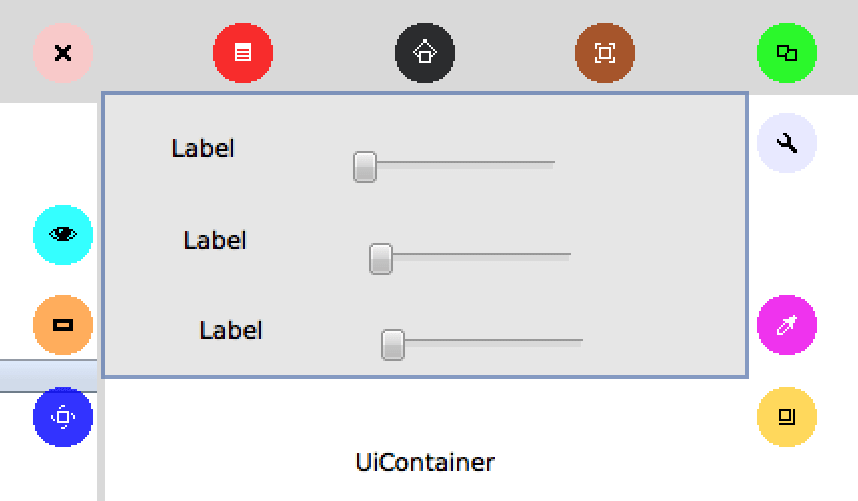
Drag two more labels into the UI, one above the other. Don’t worry about lining them up exactly: we’ll use the Geometry inspector to update their position in a moment.
Next, under “Input Widgets”, the first item should be “Slider”. Drag three sliders into the gray box, each one just to the right of one of the labels.
Now, let’s line these elements up. Click the topmost Label. In the right sidebar under Geometry, change the topLeft to “20@20”. Confirm the change by pressing the Return key. The Label should move so that it is an equal distance from the top and left of the gray box.
“20@20” is how a two-dimensional Point is represented in Squeak: the first number is the horizontal position and the second is the vertical position. This value is actually Smalltalk code: 20 is a SmallInteger object, and the @ message is sent to it, with the argument being another SmallInteger: 20 again. In response to this message, the SmallInteger returns a new Point object with both x and y coordinates set to 20.
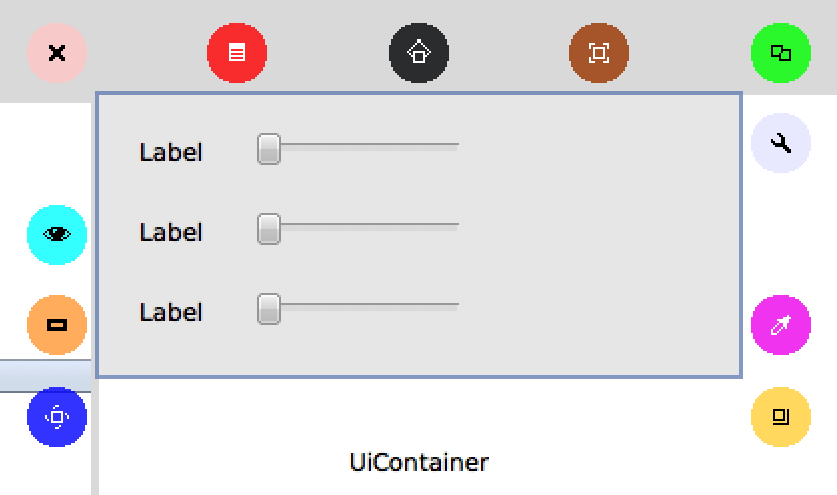
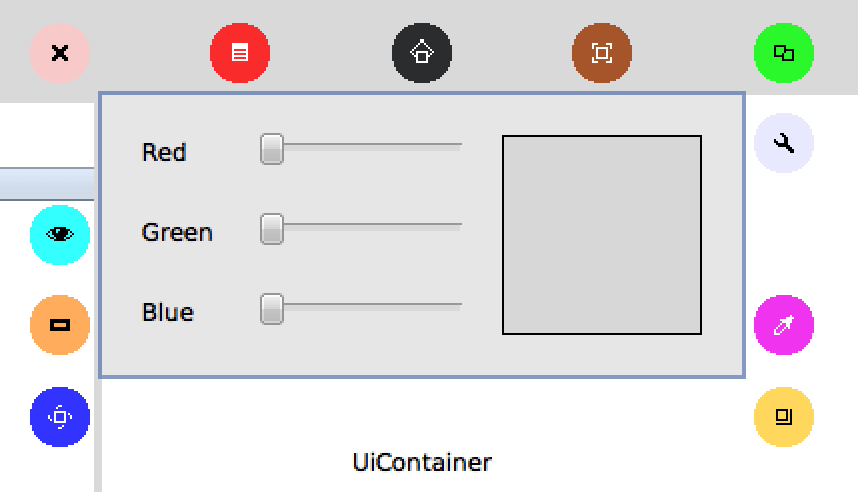
Next, set the second label to a topLeft of “20@60” and the third to “20@100”. Then position the three sliders at “80@20”, “80@60”, and “80@100”. If it worked, you should see the labels and sliders nicely arranged line in the screenshot below. If anything looks different, click each element and compare its position to the values above.
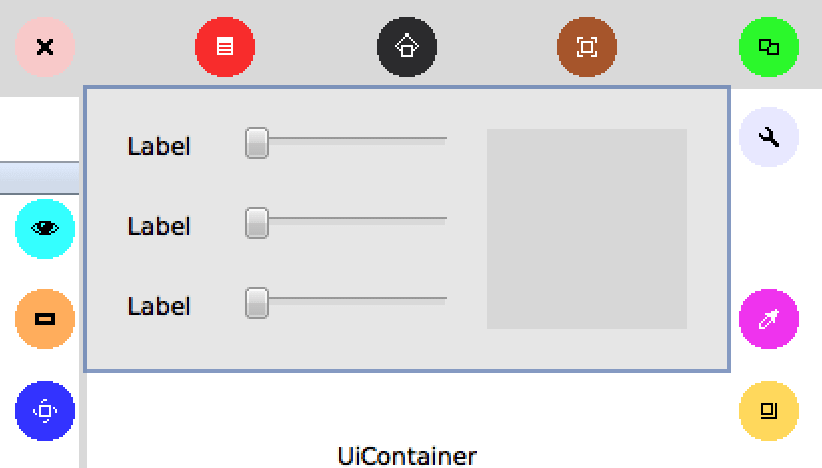
Next we need one more UI element: a square that we’ll use to display the selected color. For this, we’ll use a “Widget Container” under “Containers”. Drag it to the UI, then set its topLeft to “200@20”. Its width and height should each start out at 100—leave those values.
Now let’s change the text of the labels. Click the topmost label. In the right hand sidebar, scroll to the very bottom. In a section titled “Label” you should see a “text” row containing the text “Label”. Change that to “Red” and press Return. You should see the text displayed in the UI changed to “Red”. Now change the middle label to “Green” and the bottom label to “Blue”.
Next, we’re going to give the square a border so we can tell where it is even if its color is similar to the gray background. Click on the square, then in the right sidebar scroll down to the Container section at the bottom. For borderWidth, change the value from 0 to 1. You should see a black border appear around the square. Your project should now look like the following screenshot:
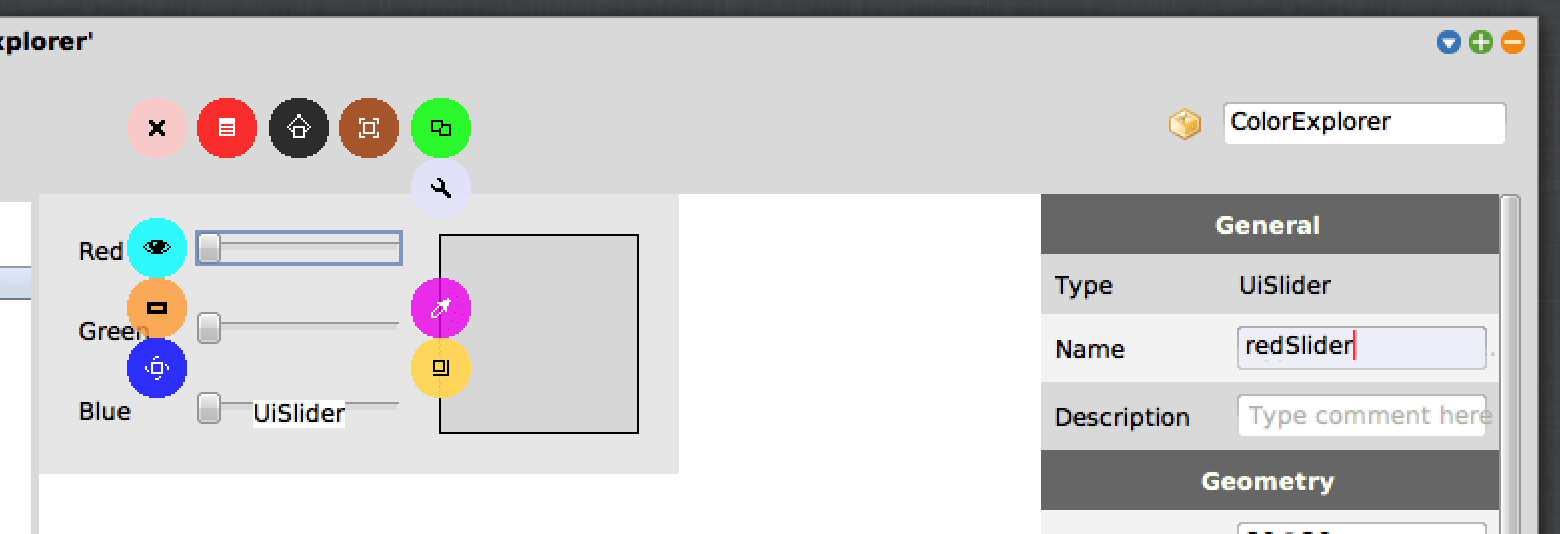
Next, we’re going to give some of the UI controls names that we can use to refer to them in the code when we add interactivity. Click on the topmost slider. Scroll the right sidebar back to the top if necessary. In the topmost section, “General”, the second row should be called “Name”. Enter the value “redSlider” into that field and press Return.
Next, give the middle slider the name “greenSlider”, and the bottom one “blueSlider”. Click on the square we added on the right and give it the name “swatch”.
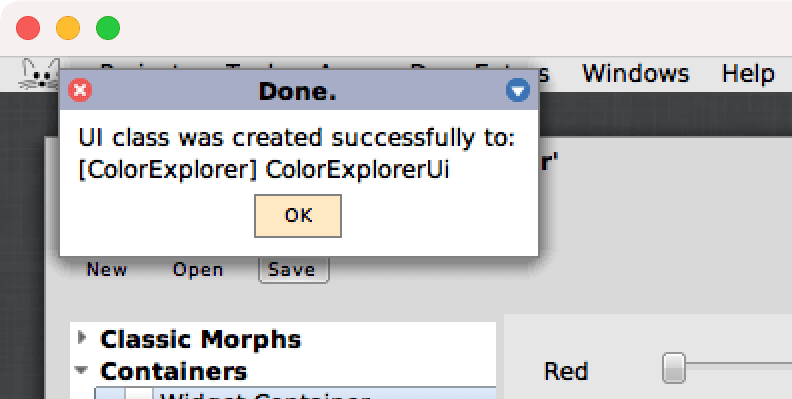
With this, our interface is done! Save it by clicking the “Save” icon in the toolbar at top-left. You will see a window that says “Done. UI class was created successfully to: [ColorExplorer] ColorExplorerUi”.
Click “OK” to close the dialog. With this, we’re done in Morphic Designer, so you can close the interface designer window using the red X button at top-left.
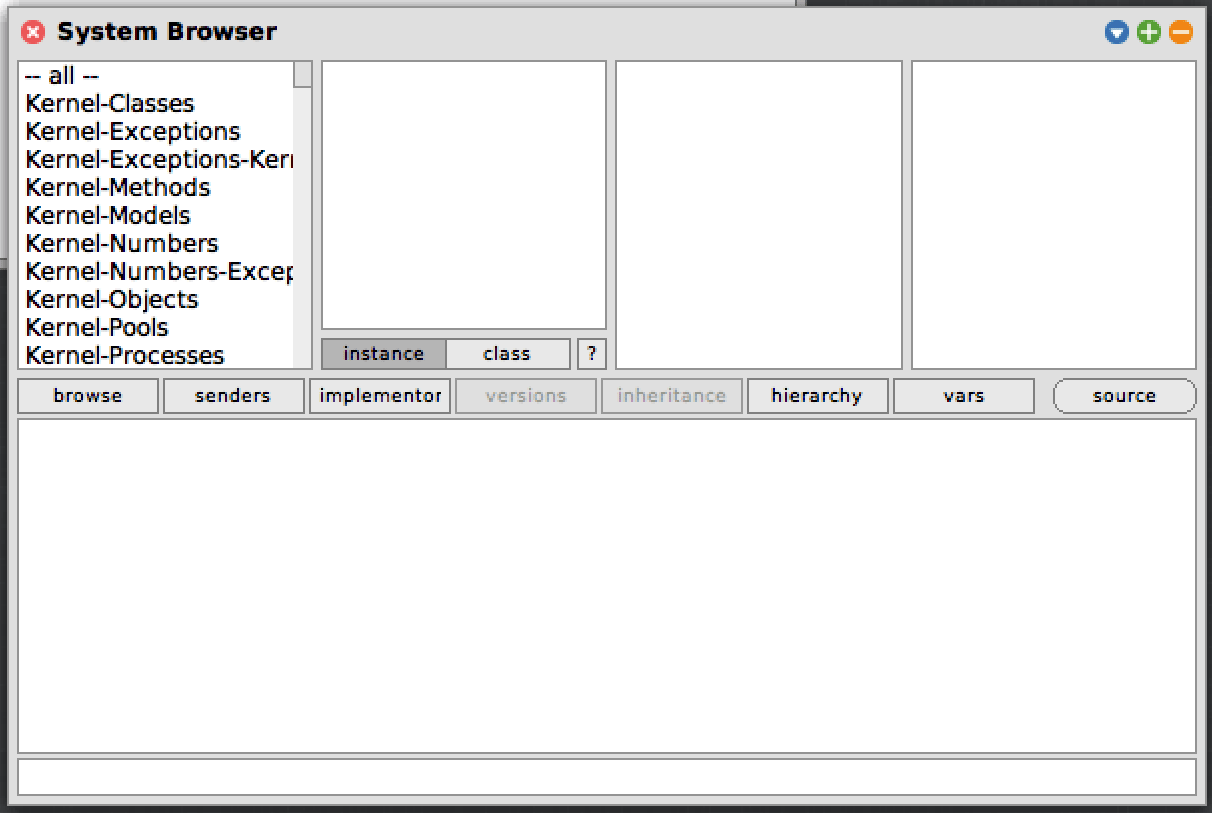
Next, let’s find the class that Morphic Designer generated and try it out. Click on the background to bring up the World menu and choose Browser. You’ll see a new window titled “System Browser” with four columns in the first row.
The leftmost column is the list of categories, which are groupings of related classes.
Click in the leftmost column and start typing “Color”. This should filter the list so that only the “ColorExplorer” category shows. “ColorExplorer” is the name of the category we asked for our UI to be created in.
In the second column, you should now only see a single row, that says “ColorExplorerUi”.
The second column is the list of classes in the current category. We asked Morphic Designer to refer to our interface as “ColorExplorer”, and it appended the suffix “Ui” to the name of the class it created. Click on “ColorExplorerUi”.

Now, in the third column you should see three rows:
- “– all –”
- “accessing”
- “ui - private”
The third column is the list of protocols in the current class. Protocols are groupings of methods. Smalltalk classes tend to have many methods, so grouping them can make it easier to find the ones you’re looking for. “– all –“ shows all the methods in all protocols.
Click “accessing”. This protocol allows other objects to access data in the current object. In the right-hand column we see:
- “blueSlider”
- “greenSlider”
- “redSlider”
- “swatch”
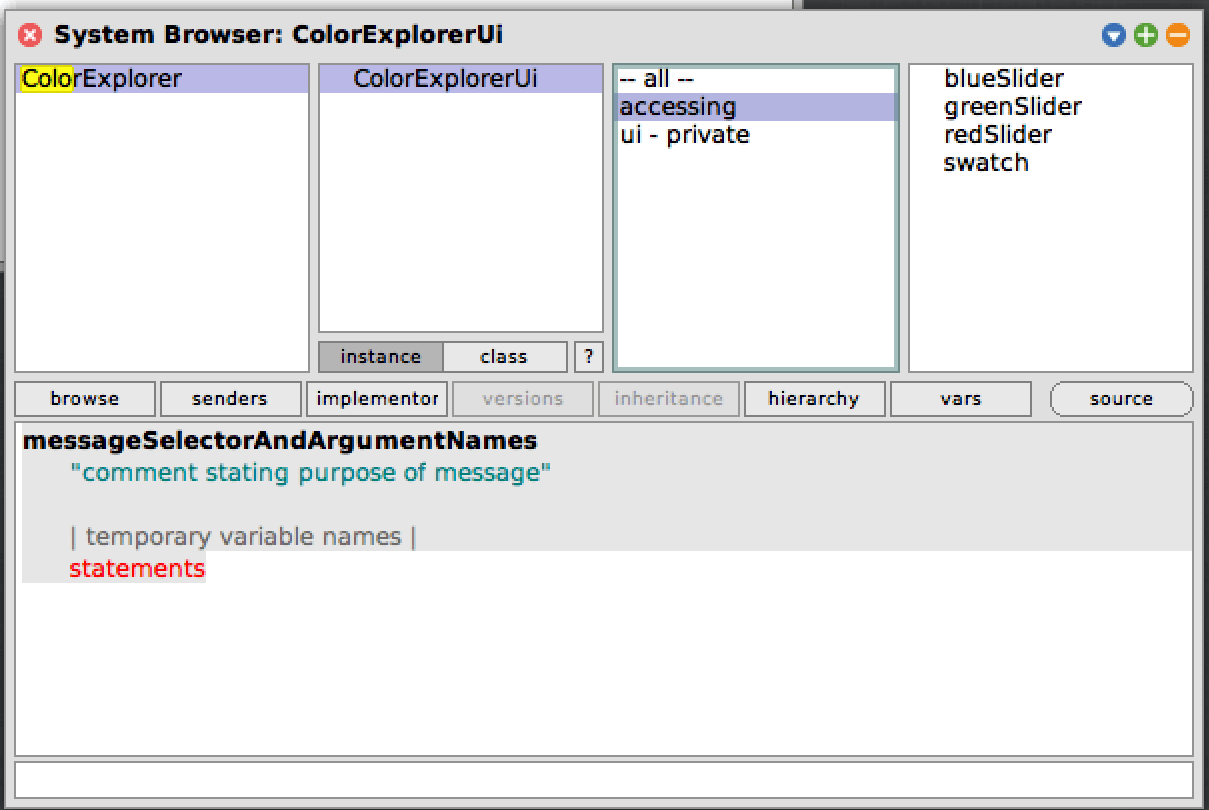
The rightmost column is the list of methods in the currently-selected protocol. These four methods are accessors, one for each of the UI elements we gave a name to. If we send one of these messages to the UI object, it will return the corresponding UI element.
Next, click “ui - private”. There is one method: “initializePanel”. Click on it. At the bottom you’ll see the method definition. It’s quite long. The first few lines are:
initializePanel
	"This code is auto-generated. DO NOT modify it because another generation step will overwrite all changes."

	| unnamedMorph1 unnamedMorph2 unnamedMorph3 |

	panel := UiContainer new.
	panel extent: (320@140).
	panel position: (0@0).
	panel hResizing: (#rigid).
  ...
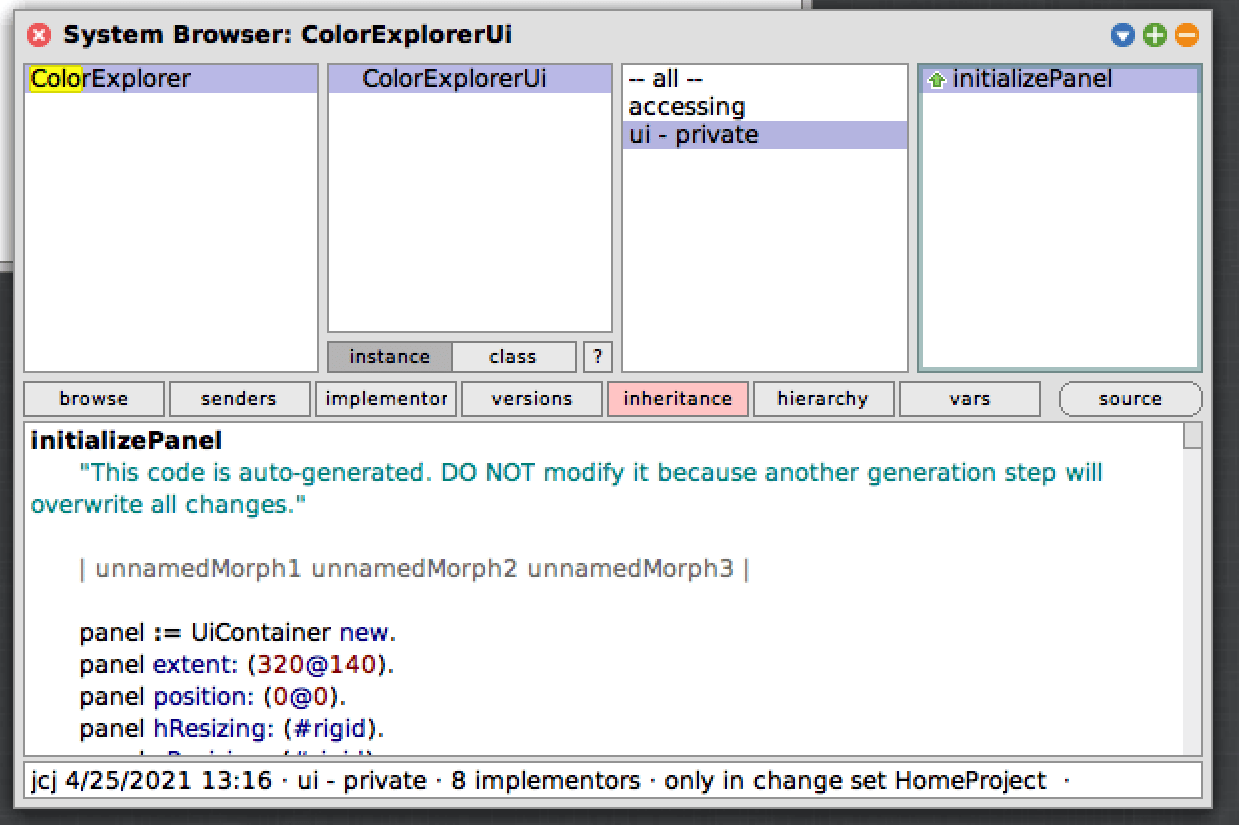
As you may be able to infer by skimming, this method creates each UI element we specified in Morphic Designer and gives it the values we configured for it. This is what we don’t have to write by hand. Thanks, Morphic Designer!
The ColorExplorerUi class creates our user interface, but it doesn’t yet have interactivity. We’ll create a class for our overall application, ColorExplorer, that will show the UI and give it behavior. To do so, we’ll follow the steps helpfully provided on the Morphic Designer home page.
Writing App Functionality
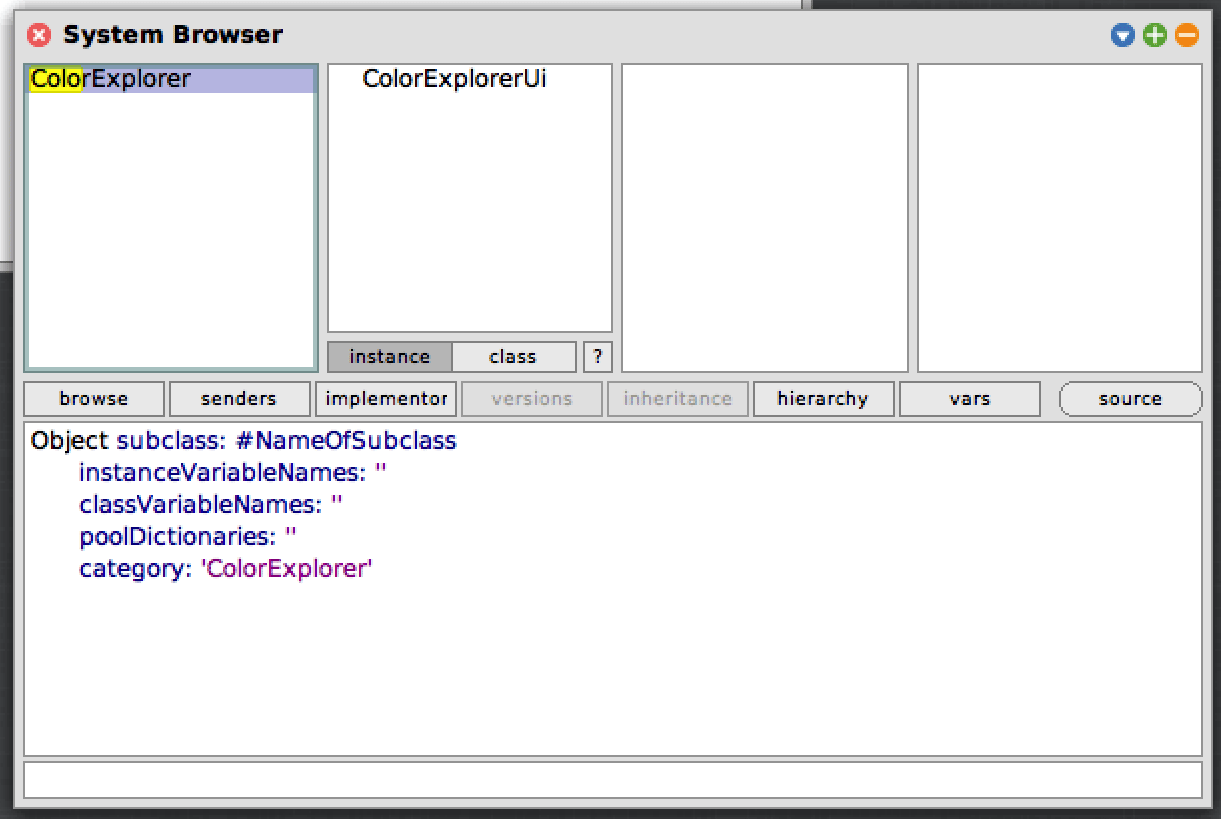
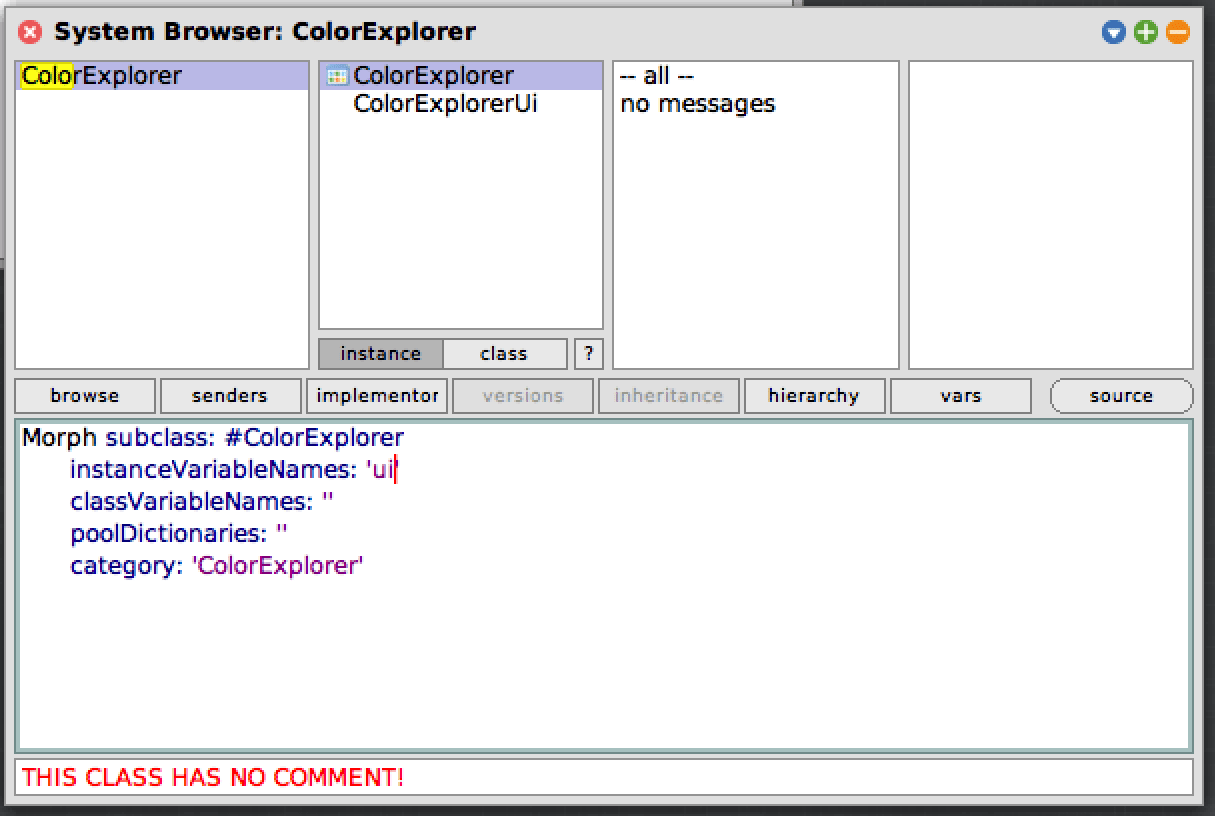
In the second column from the left, click the blank space under ColorExplorerUi to deselect it. ColorExplorer in the left column should still be selected. In the bottom of the window you should see:
Object subclass: #NameOfSubclass
	instanceVariableNames: ''
	classVariableNames: ''
	poolDictionaries: ''
	category: 'ColorExplorer'
Squeak has helpfully pre-filled for you the message to send to Object to create a new class. Make the following changes:
- Replace
Object, the parent class, withMorph. This is the base Squeak class for UI elements. - Change
#NameOfSubclassto#ColorExplorer. This defines what the name of the subclass will be (minus the#) - Add “ui” to the string of
instanceVariableNames
After these changes, you should see:
Morph subclass: #ColorExplorer
	instanceVariableNames: 'ui'
	classVariableNames: ''
	poolDictionaries: ''
	category: 'ColorExplorer'
Next, “accept” that content by right-clicking and choosing “accept”, or by pressing Command-S on a Mac. You should see ColorExplorer appear in the second column.
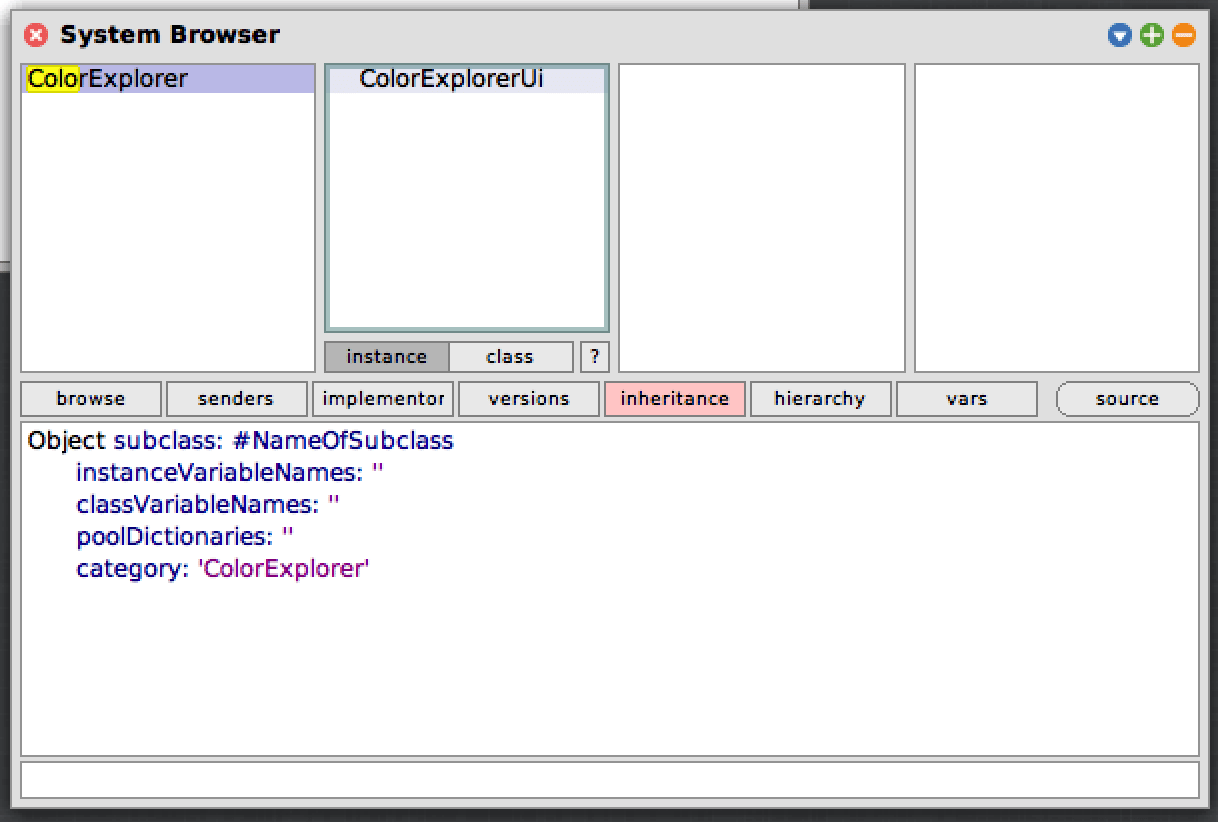
Next, we need a way to initialize our UI. We’ll handle this via an accessor method with lazy initialization. Make sure ColorExplorer is selected in the second column, then click “no messages” in the third column. In the bottom you’ll see a sample method definition pre-populated:
messageSelectorAndArgumentNames
	"comment stating purpose of message"

	| temporary variable names |
	statements
Replace it with the following:
ui
  ^ ui ifNil: [ui := ColorExplorerUi new]
(Note that the “i” at the end of ColorExplorerUi is lower-case; if you accidentally type a capital “I” you should receive an error “Unknown variable ColorExplorerUI”. You can fix this error by choosing ColorExplorerUi from the list presented and clicking “Accept”.)
Accept it and you should see “ui” appear in the rightmost column.
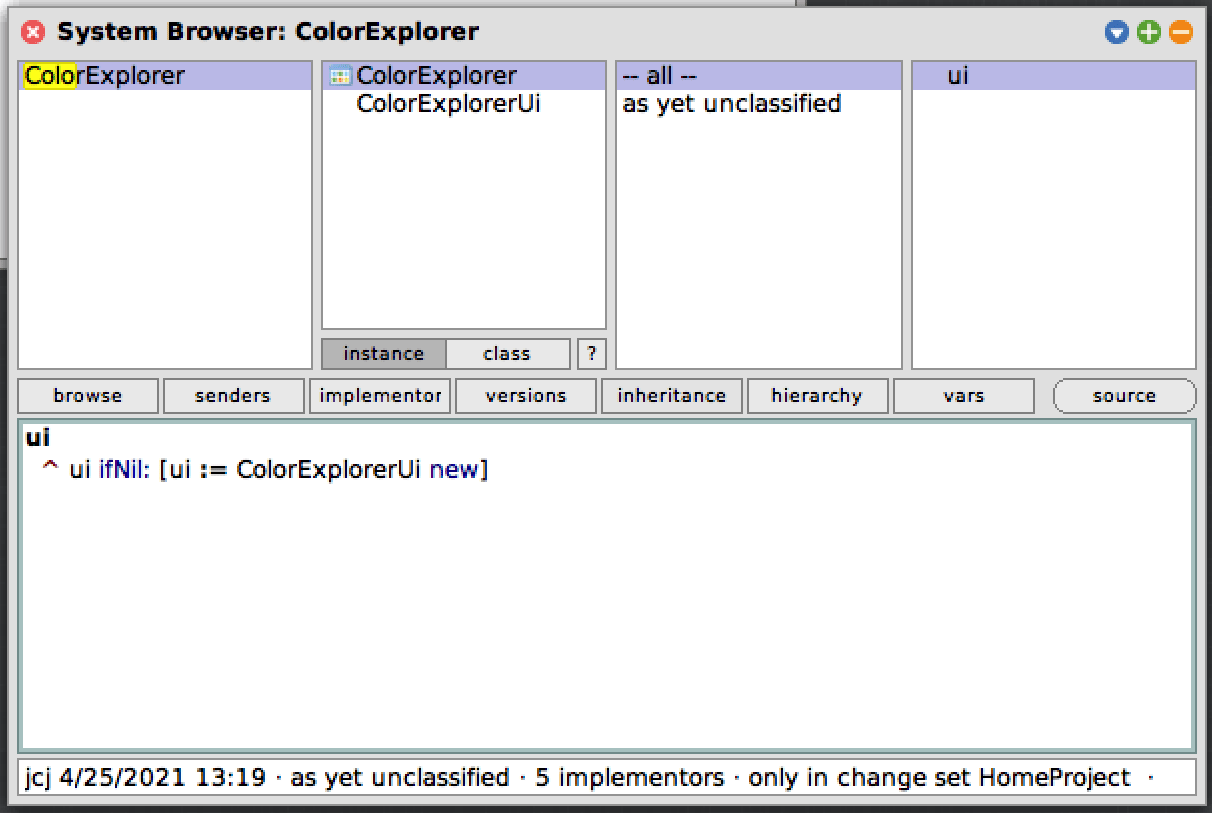
Inside the method, ui refers to the instance variable we declared. We send it the ifNil: message, giving it a block to execute if the variable is nil. If it’s nil, we send the message new to ColorExplorerUi to create a new instance of it, then we assign that instance to ui. The caret (^) indicates that we return the value of ui ifNil:.
Whether or not ui is nil, this statement will return the value of ui:
- If a
ColorExplorerUihas been assigned toui, it inherits theifNil:method fromProtoObject, which just returns the object itself - If
uihas not been assigned, theifNil:message will be sent to anUndefinedObject. ItsifNil:method will execute the block and then return the value of the block.
Next, when a ColorExplorer is initialized, we want to initialize the UI as well. We can do this by defining an initialize method on ColorExplorer. Click the empty space in the third column again to get the method definition placeholder, then replace it with:
initialize
   super initialize.
   self ui setupUi: self.
Accept it.
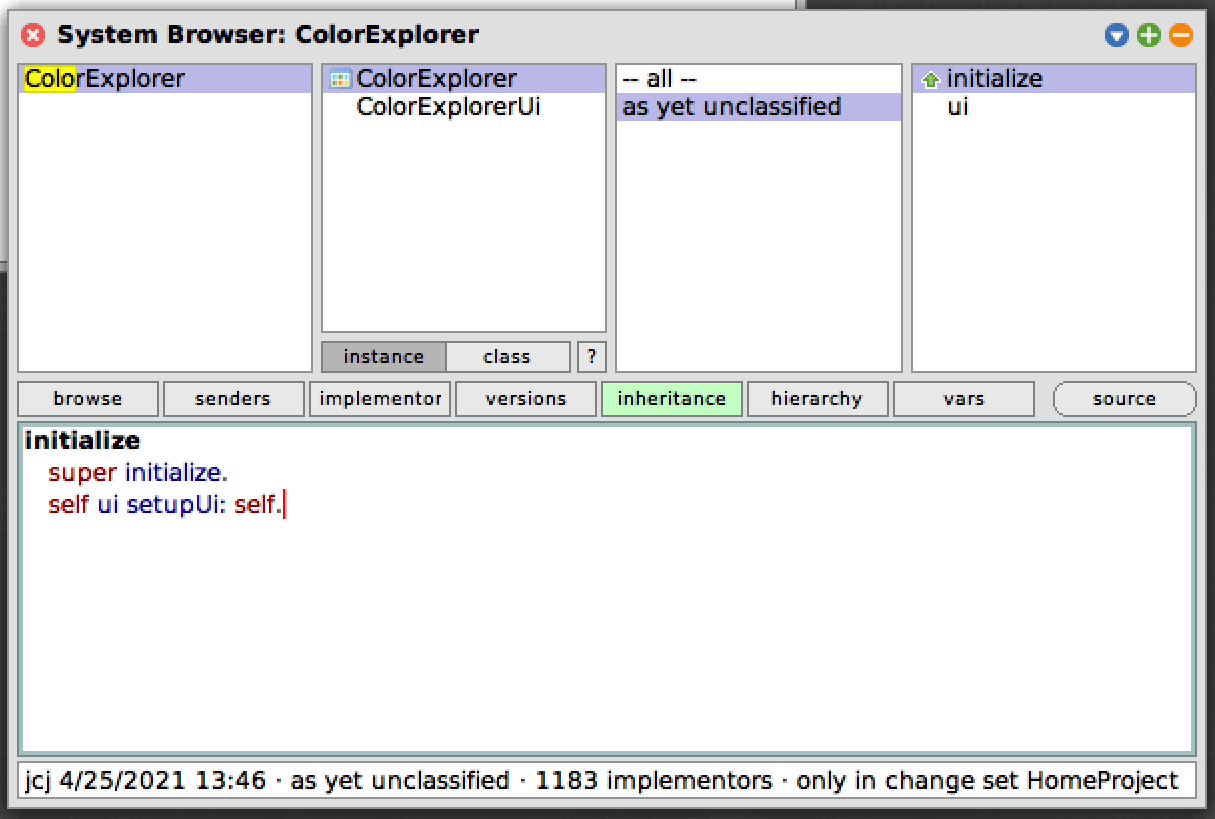
First we send the initialize method to super, which calls the superclass’s initialize method. Next, we send the ui message to get our UI lazily initialized, then we send it the message setupUi: self.
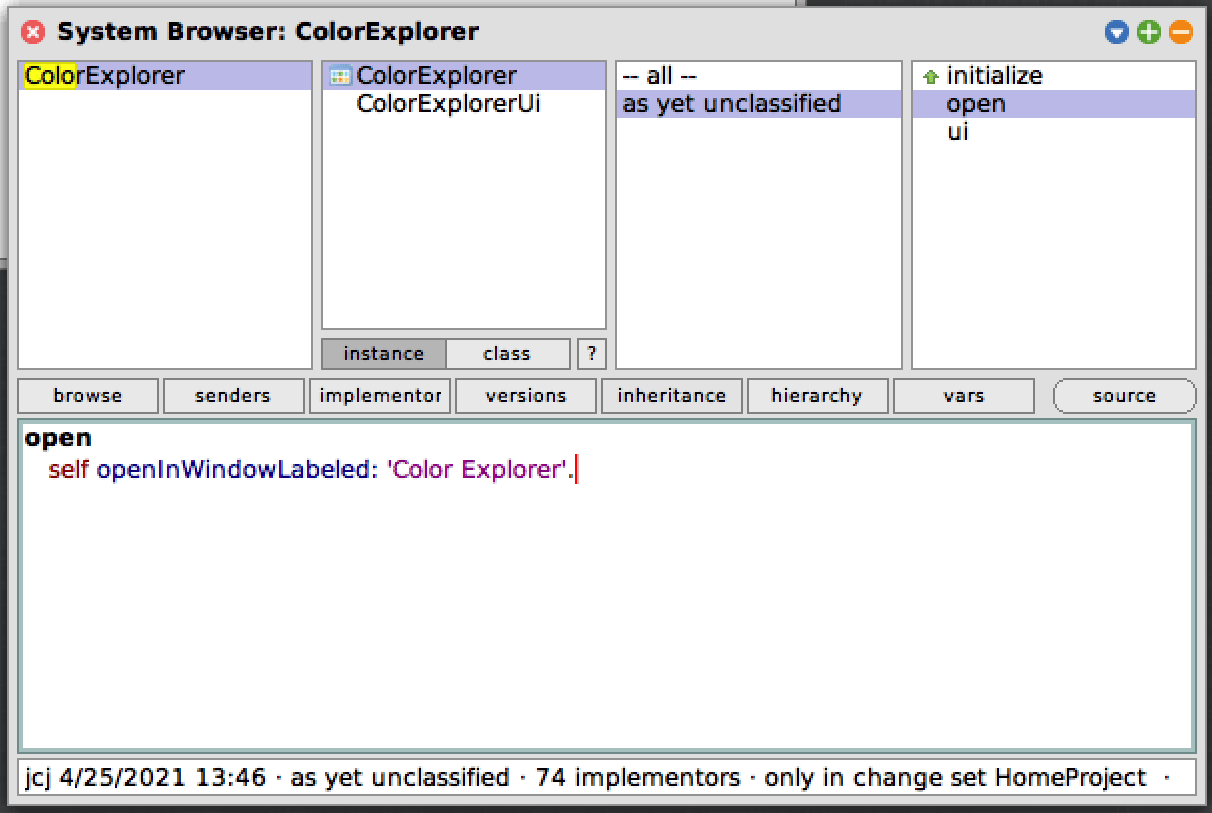
Next, let’s create a method to open this UI in a window. Create another method on ColorExplorer:
open
   self openInWindowLabeled: 'Color Explorer'.
You should now see three methods in the rightmost column: initialize, open, and ui.
Let’s make sure we can get the app opening. If you don’t have a Workspace window open anymore, open it by clicking on the background then choosing “Workspace”. If you still have a Workspace open, delete its contents. Then enter:
ColorExplorer new open
This creates a new instance of the ColorExplorer class, then sends it the open message. Do it, and you should see your color explorer window open!
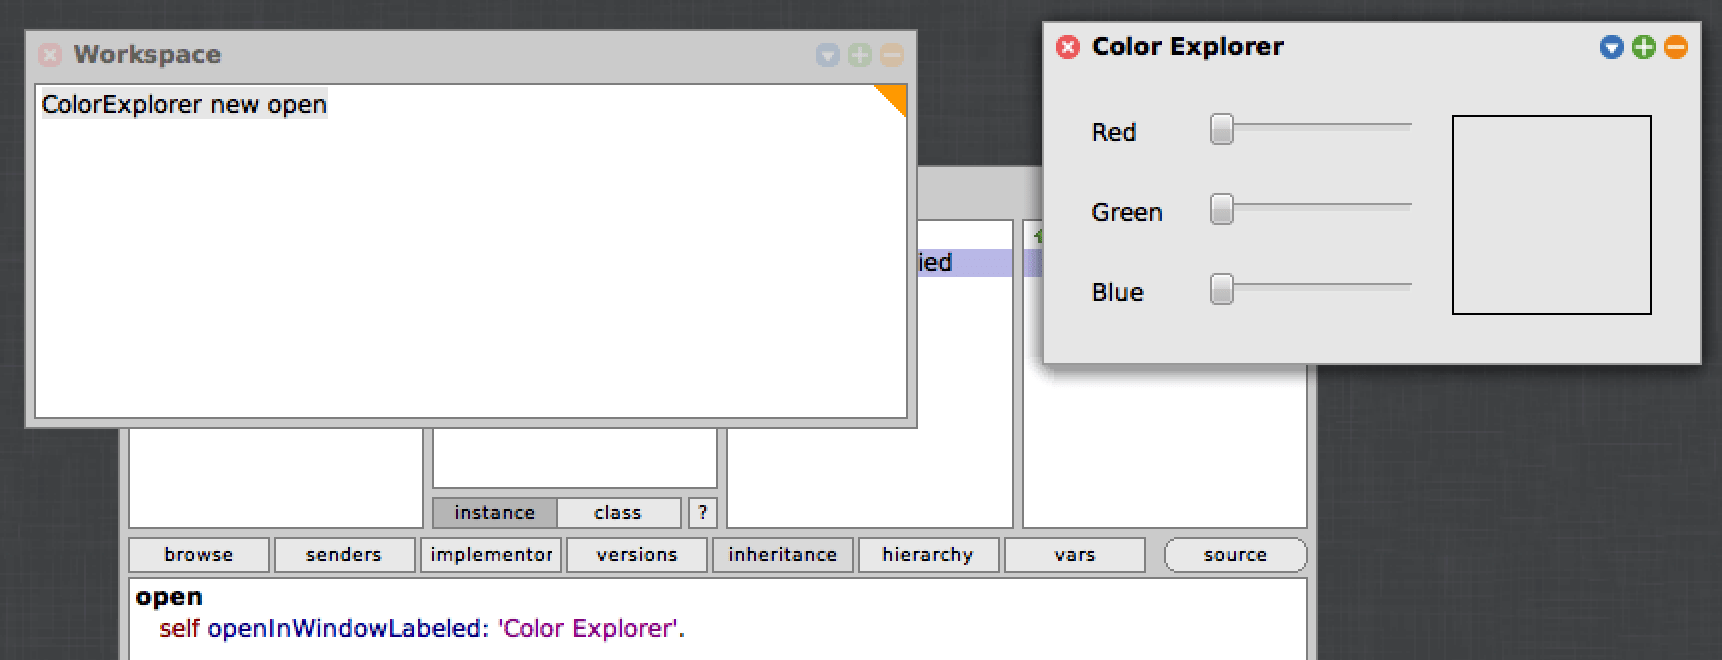
You can drag the window around and drag the sliders, but the color of the swatch doesn’t yet change. Now it’s time for us to implement that functionality.
What we want to happen is this: every time a slider is dragged to a new position, we want the color swatch’s color to be updated to the color specified by the latest position of the sliders.
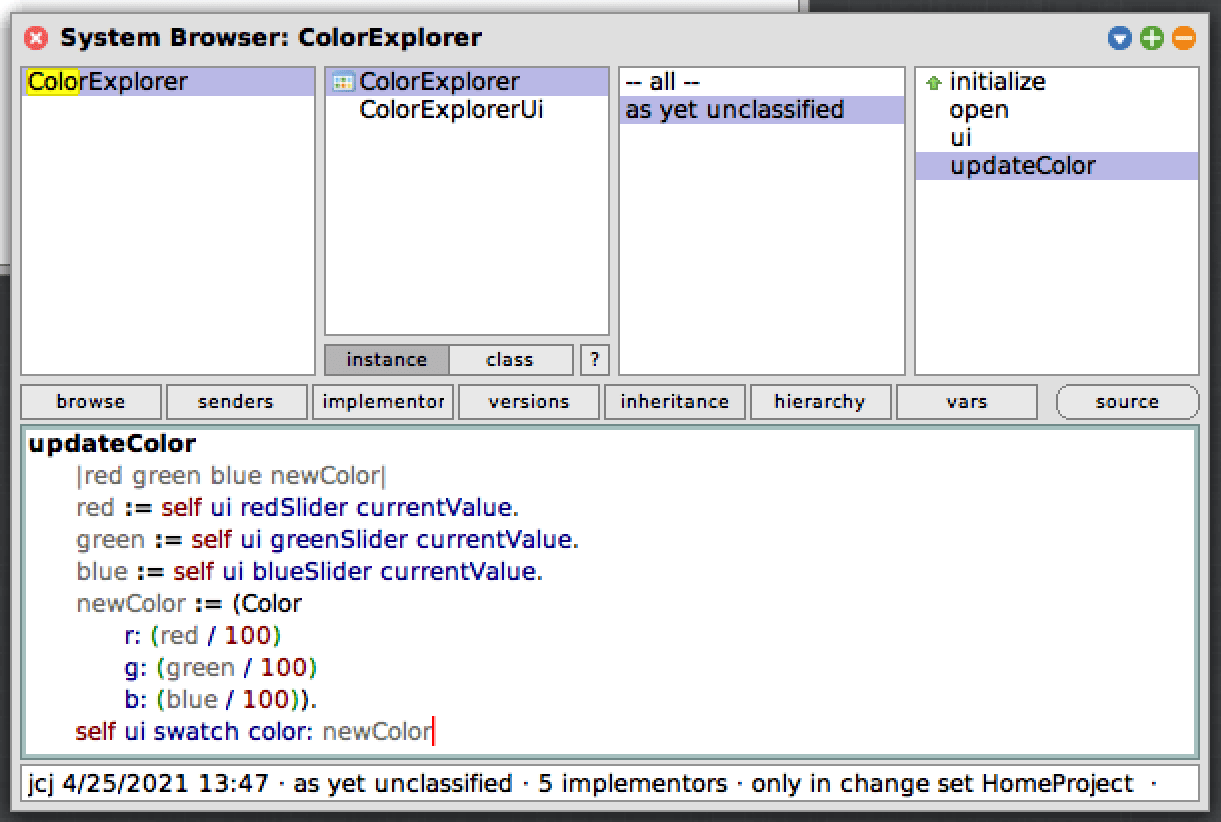
First, let’s define the method that will do this updating. Define a new method updateColor on ColorExplorer:
updateColor
	|red green blue newColor|
	red := self ui redSlider currentValue.
	green := self ui greenSlider currentValue.
	blue := self ui blueSlider currentValue.
	newColor := (Color
		r: (red / 100)
		g: (green / 100)
		b: (blue / 100)).
	self ui swatch color: newColor
Between the vertical bars, we define several temporary variables only accessible in this method: red, green, blue, and newColor.
Next, we retrieve the red value from the slider. We send the message ui to self to get the UI. Then, we send the message redSlider to the UI to access the red slider. Once we have the slider, we send it the currentValue message to retrieve the value.
We do the same to retrieve the values of the green and blue sliders.
Next, we assign a new Color instance to the newColor variable. We send the Color class the instance creation message r:g:b:, which specifies the red, green, and blue values for the new color. Color expects these values to be in the range 0 to 1, but our sliders by default have values in the range 0 to 100. To modify the values, we divide each by 100 before passing it in.
Finally, we send the swatch message to the UI to retrieve the swatch square. We send it the color: message, passing it the newColor as the argument. Morphic Designer follows the Squeak convention of giving setter messages the same name as the instance variable they’re setting, and taking the new value as the argument.
Accept the updateColor method, and it should be set. We haven’t yet hooked it up to the sliders, but we can test it out right away because of Squeak’s dynamic environment.
If you still have a Color Explorer window open, close it. Then, in the Workspace, replace the contents with:
ColorExplorer new
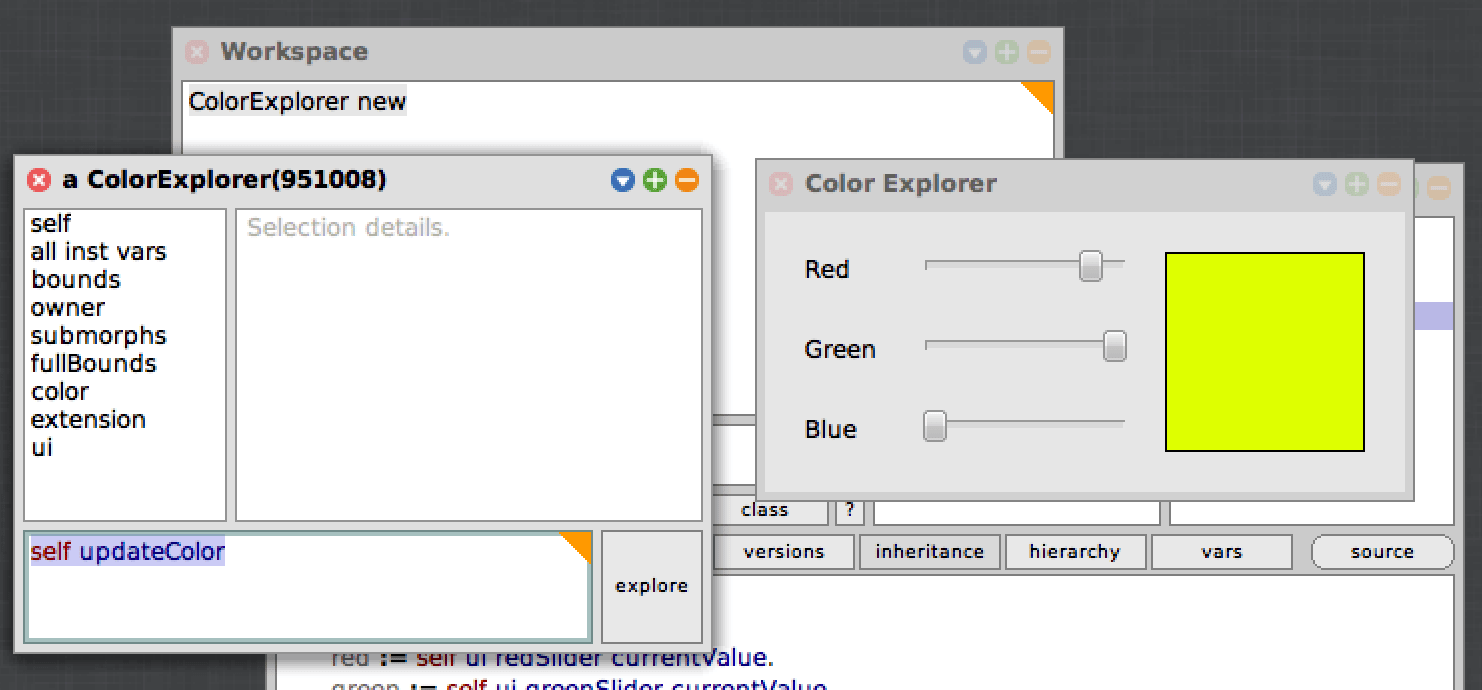
Instead of issuing the “do it” command, right-click and choose “inspect it (i)”. This runs the code, creating a new ColorExplorer instance, then opens an inspector window that allows you to see its instance variables and interact with it.
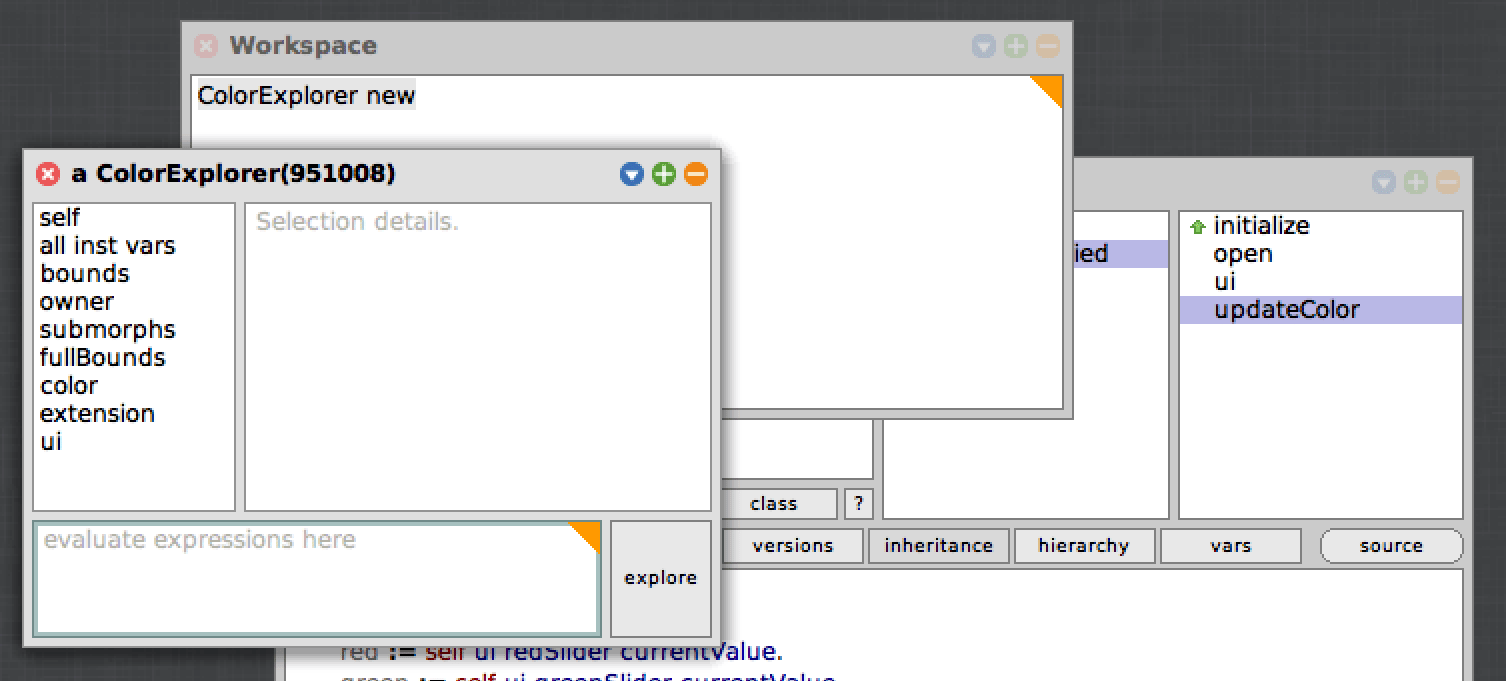
In the “evaluate expressions here”, type self open, then do it. The Color Explorer window opens.

The reason we opened the ColorExplorer instance in an Inspector is that now we can send it other messages as well.
Notice that the sliders are at the far left by default, which is a value of 0, correspoding to the color black. Type the expression self updateColor in the inspector expression area, then do it. The swatch changes to black!
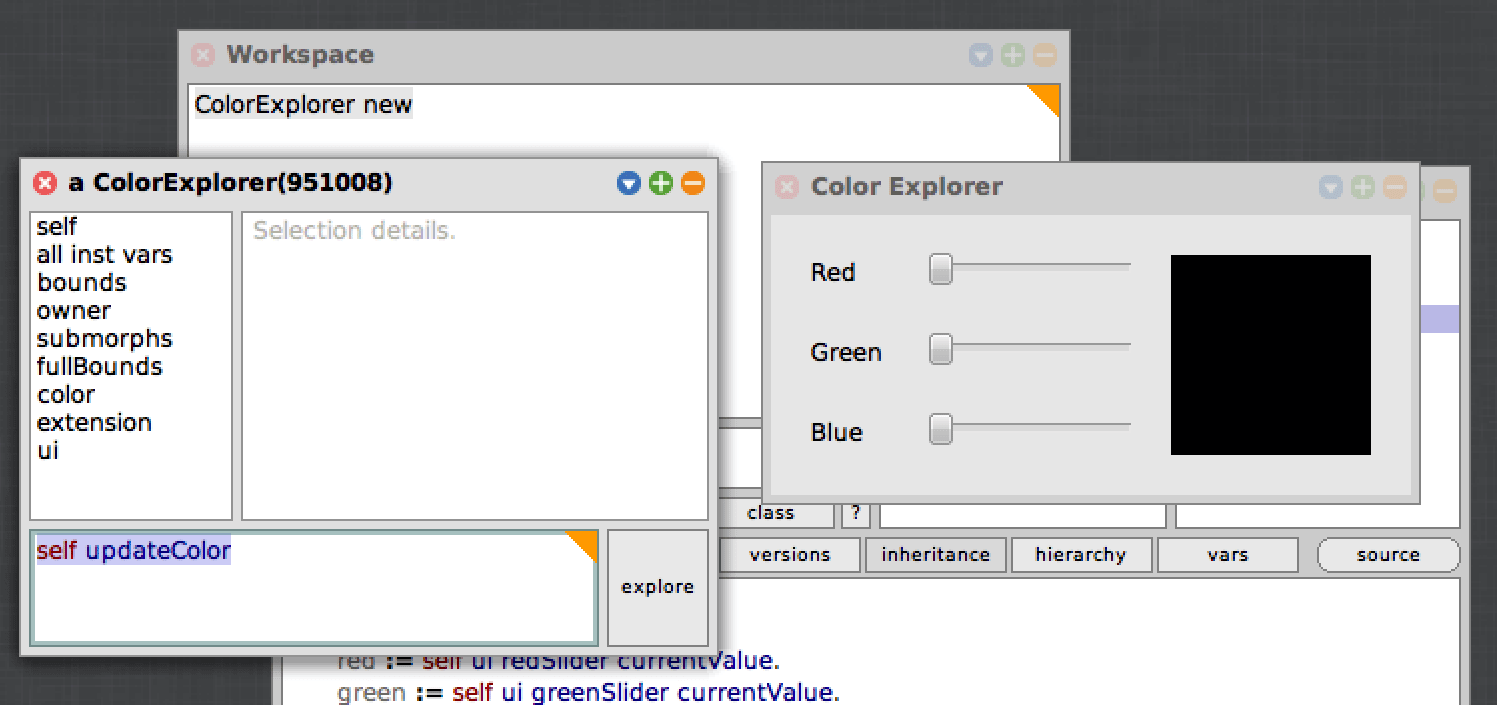
Try sliding the sliders, then doing self updateColor again, and note that you get a different color. This confirms our updateColor method is working.
All that remains is to set up our code to send the updateColor message to ColorExplorer every time a slider changes. To help us add that behavior to the sliders, first let’s define a helper method to retrieve all the sliders.
Create the following method on ColorExplorer:
sliders
	^{self ui redSlider . self ui greenSlider . self ui blueSlider}
Curly brackets ({}) create a dynamic or runtime array. We pass the elements to it separated by periods. We create an array containing all three of the sliders and return it.
Next, we’ll use that array to configure each slider so that when it’s changed the updateColor message is sent to ColorExplorer. UI elements created by Morphic Designer use a different mechanism for adding behavior than built-in Squeak morphs, called Signals. Let’s see how they work.
Add the following lines to the initialize method and accept them:
 initialize
 	super initialize.
 	self ui setupUi: self.
+	(self sliders) do: [ :slider |
+		self connect: slider
+			signal: #valueChanged:
+			toSelector: #updateColor
+	]
We send the sliders message to self to get the array of sliders back. Then we send the do: message to the array, so that each element of the array will be passed to a block we supply. We pass that block, naming the variable the block receives :slider. We send self the message connect: slider signal: #valueChanged: toSelector: #updateColor. This says, when slider receives the signal #valueChanged, we should send the message #updateColor to self.
Because this change was made in the initialize method, we’ll need to recreate ColorExplorer to see the effect. Close the Color Explorer window, then change the Workspace code back to ColorExplorer new open, then do it. Drag the sliders, and see the color swatch update in real time!
There’s one more thing we could improve: when the window first opens, the color swatch is the same light gray as the background, but the sliders are all at minimum, so the correct color would be black. To fix this, we can update the initialize method to send the updateColor message once at the start
 initialize
 	super initialize.
 	self ui setupUi: self.
+	self updateColor.
 	(self sliders) do: [ :slider |
 		self connect: slider
 			signal: #valueChanged:
 			toSelector: #updateColor
 	]
Close the Color Explorer again and do ColorExplorer new open again. This time, when the Color Explorer window appears, the swatch should start out black, matching the initial positions of the sliders.
If you’d like to save your code to share with others and to use on other Squeak images in the future, you can use the Monticello package manager and upload it to the SqueakSource repository. To do so, follow the instructions of chapter 2.9 in Squeak by Example, a free e-book downloadable from the Squeak Documentation page. One important note: on any image you want to download the package, you’ll need to first install Morphic Designer using the instructions at the top of this post, so that its classes are available. If you like, check out the project I uploaded to SqueakSource.
Review
Let’s take a look back at what our experience with Squeak and Morphic Designer was like:
- We were able to create our UI using a simple drag-and-drop interface.
- We were able to write the functionality for it using just a few small methods. Our code was pretty free of low-level concerns: mostly we were talking in terms of high-level UI concepts (get the value of the sliders, create a color from the values, set the swatch to that color).
- We were able to see our changes right away in the same environment we were developing in. There was no lengthy compilation step.
This tutorial didn’t get into the many other benefits of Smalltalk, such as the simple object model, the ease of viewing the code for any class, the ability to change or extend any class, the ability to write code in the debugger, and the ease of unit testing. If you’ve enjoyed this taste of Squeak and how productive it makes you, I would encourage you to read through Squeak by Example and dig into it some more!